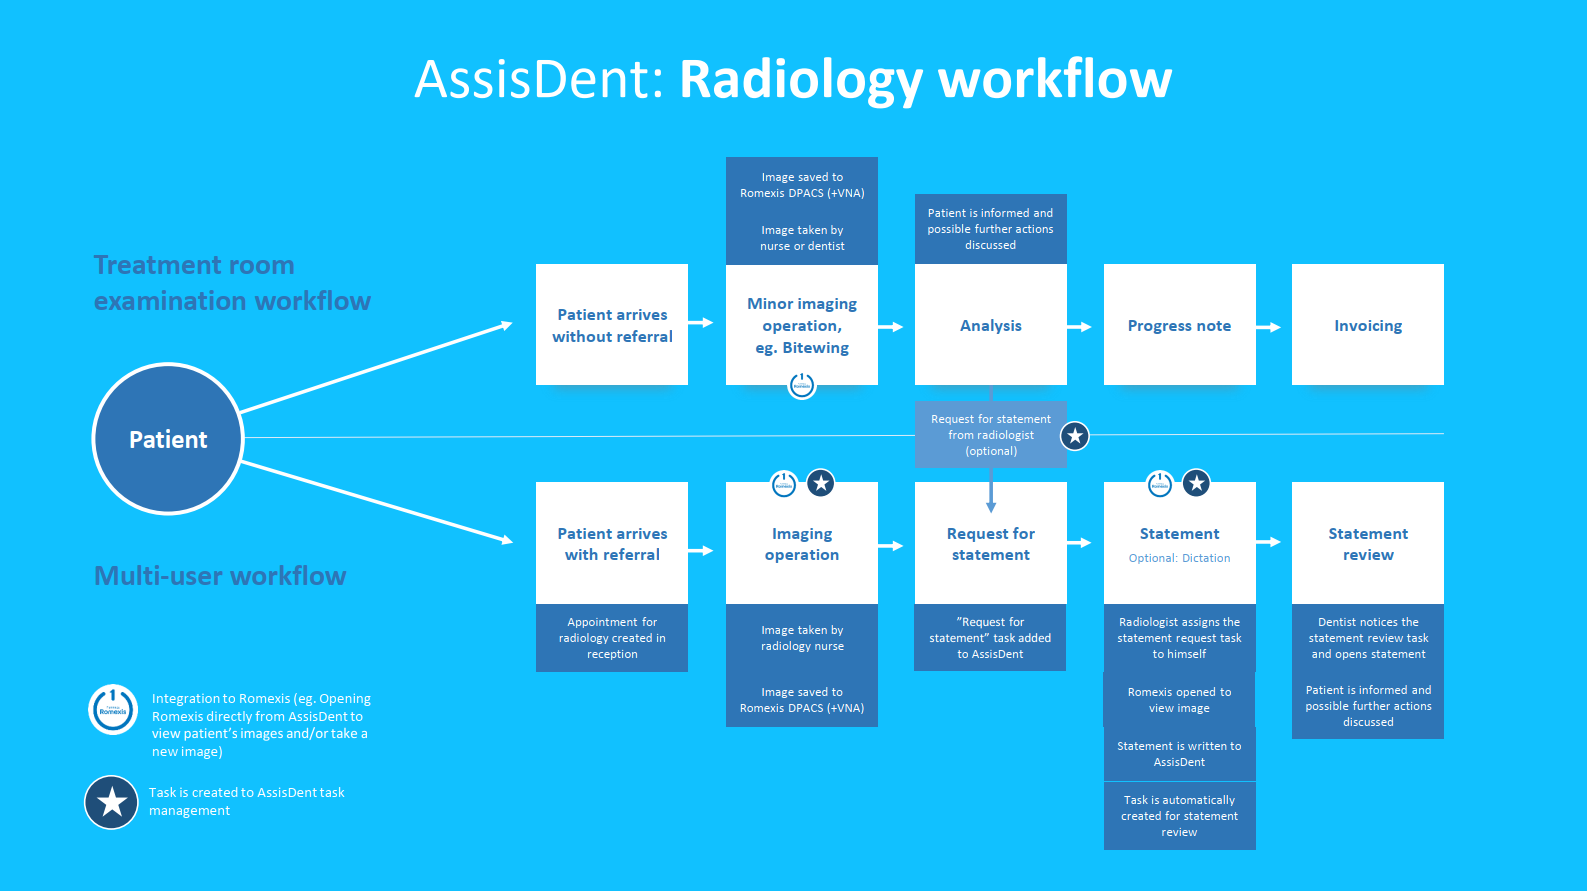
Within the Radiology work flow, you can use the AssisDent Radiology job queue to send messages to people with different roles. For example:
- A dentist can send a request for a statement to the radiologist
- The dentist will be informed when the statement for the images has been provided
- The radiologist is informed of the images requiring a statement
- The radiologist can send a dictation recording that can then be transcribed, and they are then informed when the transcription is ready
The radiology job queue function is not automatically enabled in AssisDent. This feature can be enabled by contacting AssisDent's customer service (asiakaspalvelu@entteri.fi).
Please note that when you activate the radiology job queue, it will automatically be made available to the entire organization (all clinics and employees).
Prerequisites for gaining access to the radiology job queue
- It is recommended to create employee groups, such as radiologists and dictation transcribers, before introducing the radiology job queue. Employee groups can be created in the employee register. The organization can allow users to select the desired employee as the recipient for a request for a statement or dictation by selecting this option in the Other settings tab in the System Settings.
- In My AssisDent settings, you can create Favorites lists for the job queue from the Task management tab in order to quickly filter for certain tasks and people.
- If statement dictation is in use, tick the check box for Recipient/s for imaging study request in the Other settings tab in the system settings.
Instructions for setting up the Radiology job queue: view instructions
Instructions for creating employee groups: view instructions.
Radiology job queue
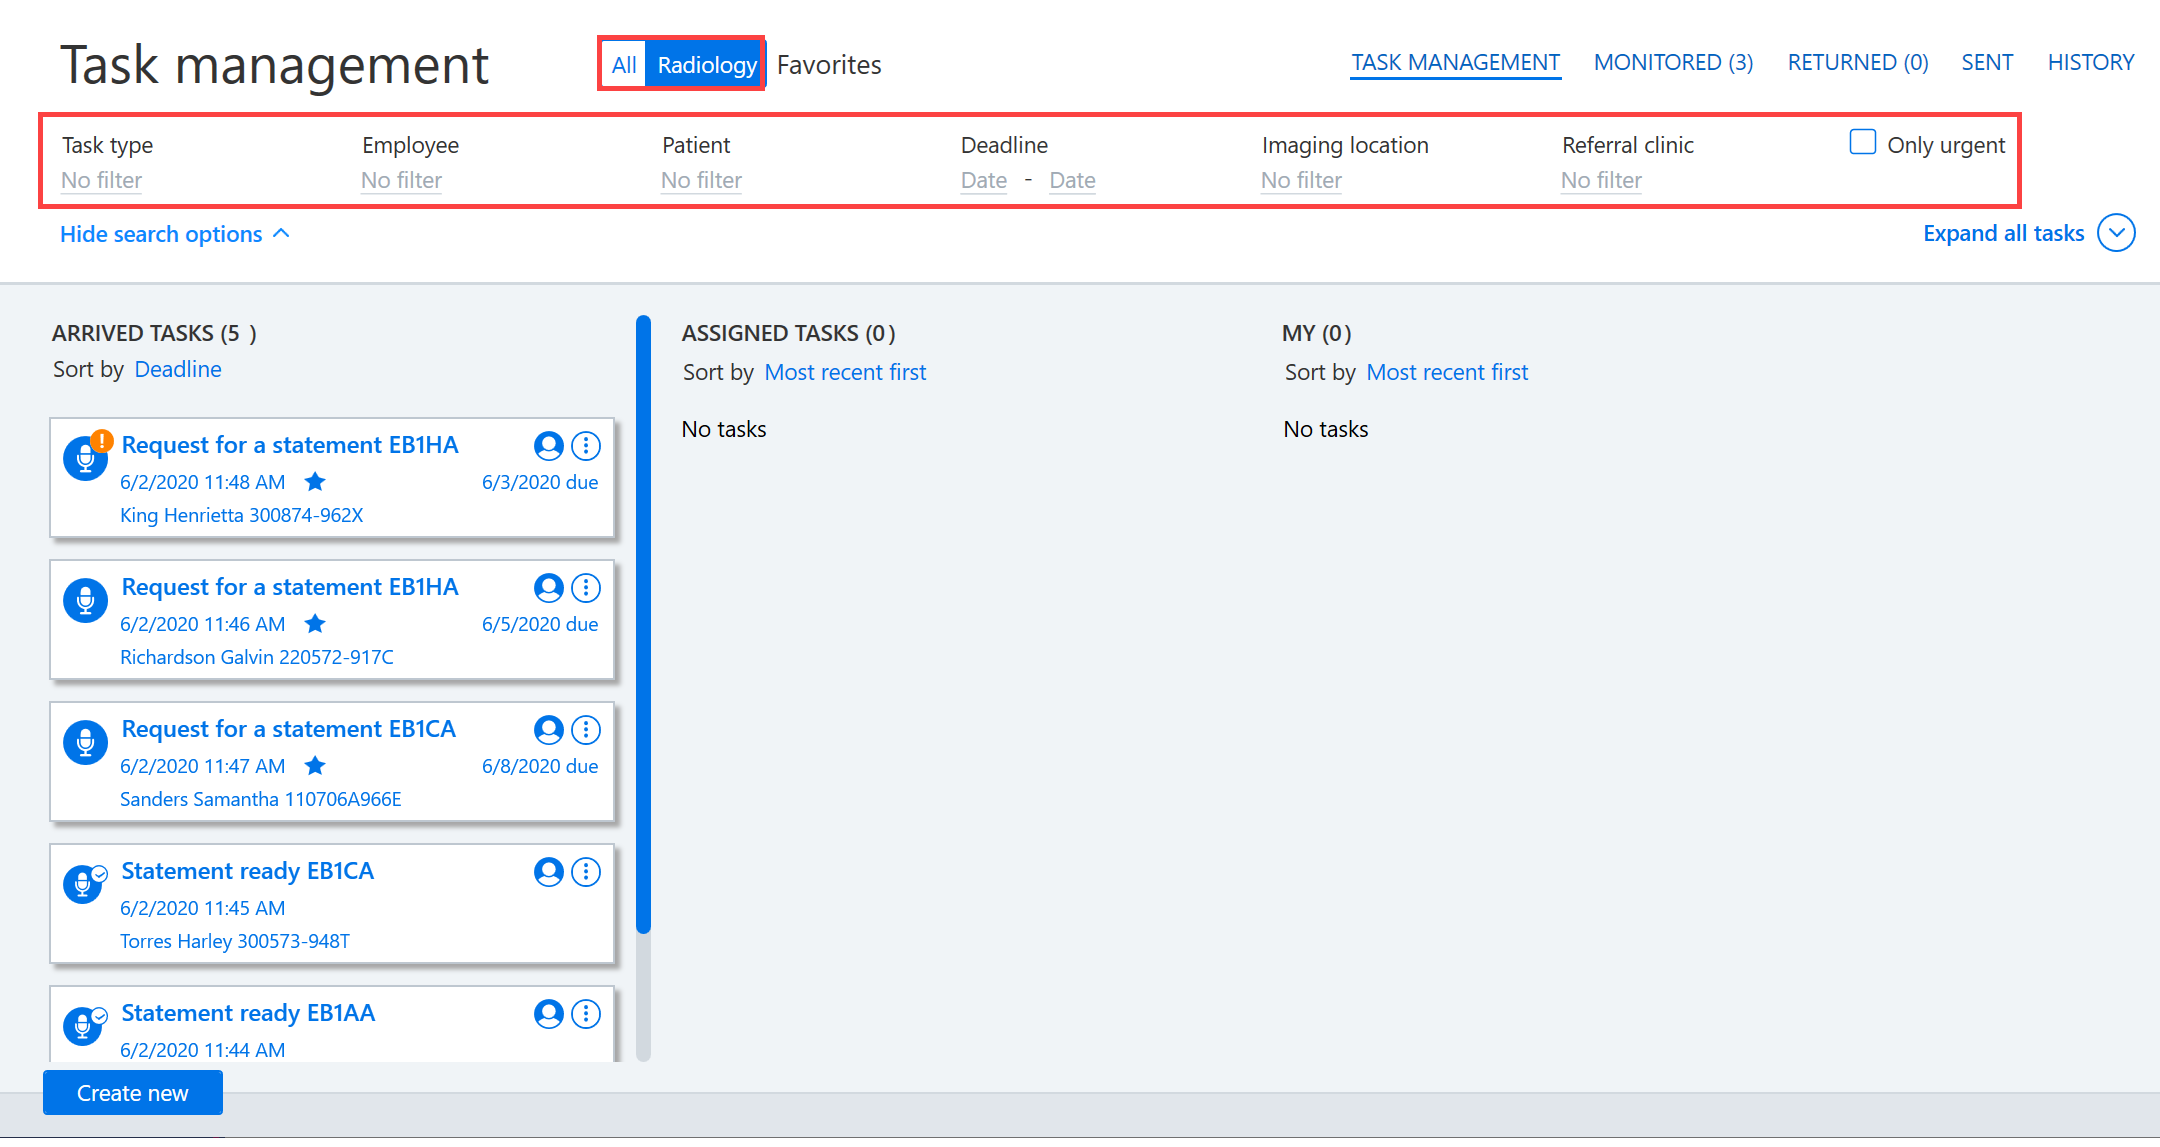
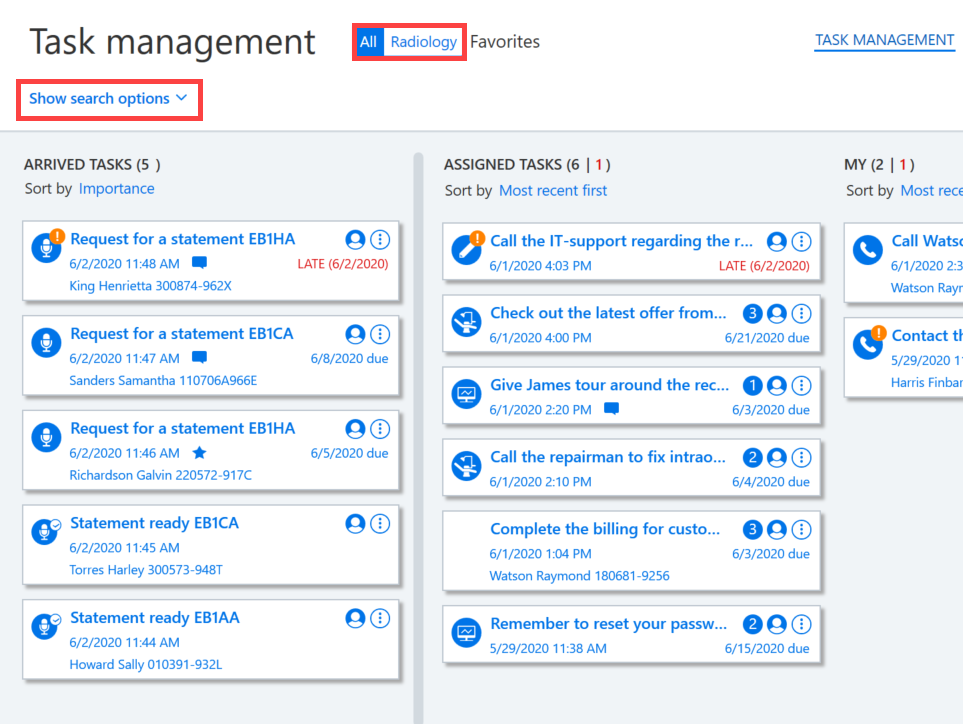
To switch the Task management views, click the All/Radiology button next to the heading. Tasks can be filtered by task type, employee, patient, and deadline. In addition, radiology tasks can be filtered according to the imaging location, the referral office and the urgency. In addition to these filter options, you can also select from the top right corner the monitored, returned, or sent tasks or those that have been moved to the history section.
Messages and comments
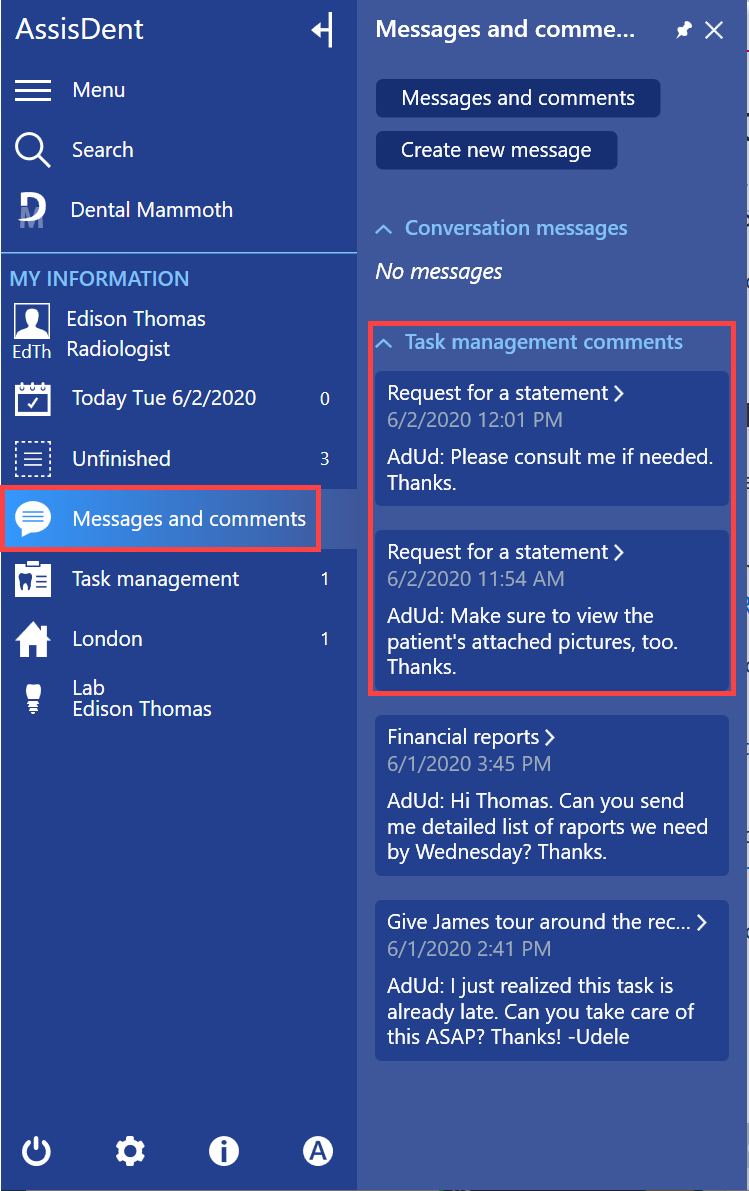
Comments related to the job queue can be managed centrally in the Messages and comments additional menu.
Request for a statement on a treatment room examination
The X-ray examination is performed at a dentist's reception as a treatment room examination, and a radiologist's statement is required for the X-ray examination.
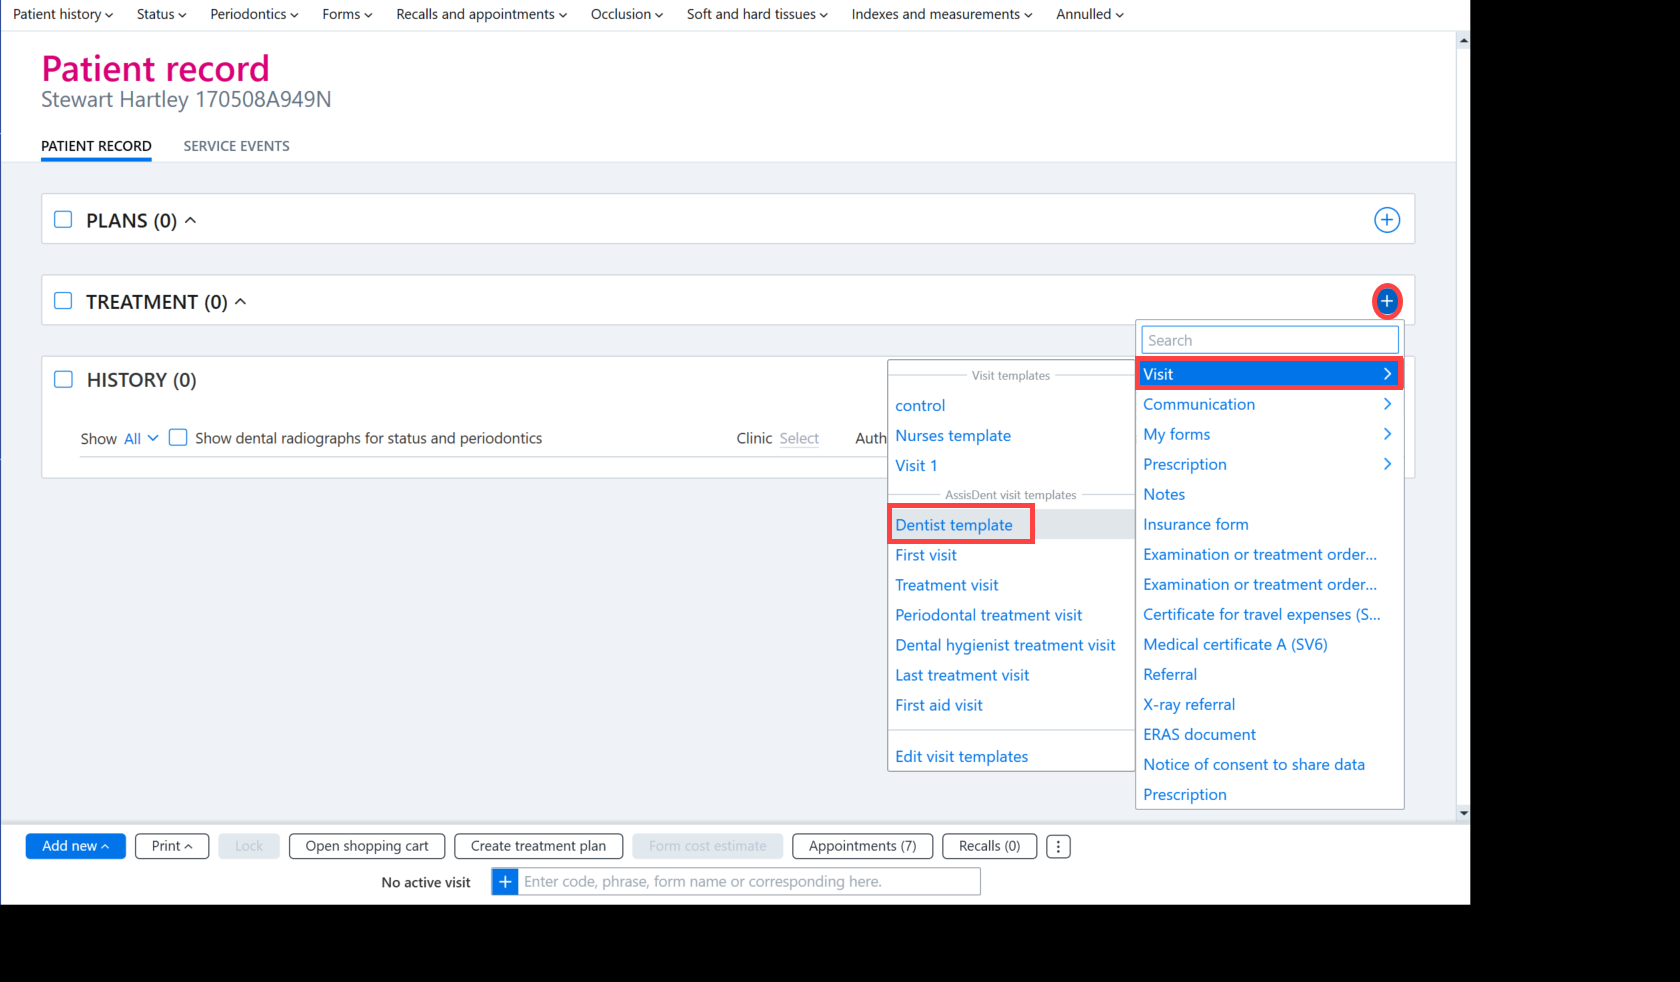
If necessary, open a new visit for the patient from the patient record. A new visit can be created by clicking the + button in the Treatment section of the patient record. Select Visit and then click Dentist template.
.
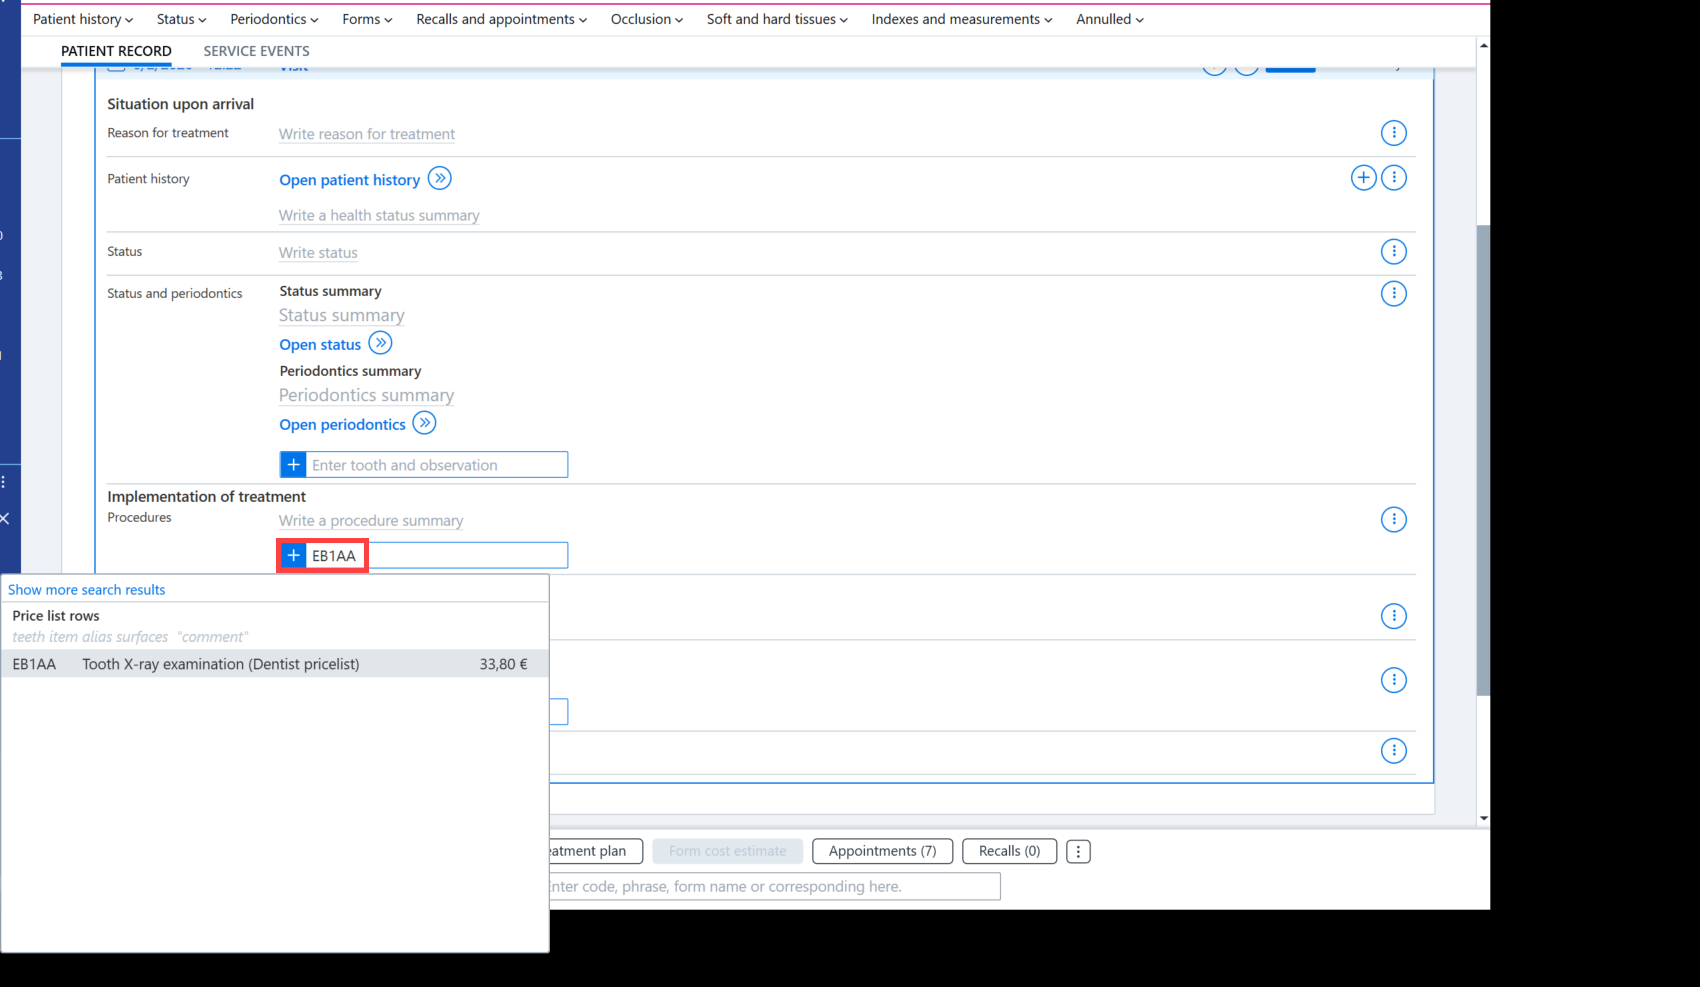
Record the X-ray examination, for example, in the EB1AA field Implementation of treatment.
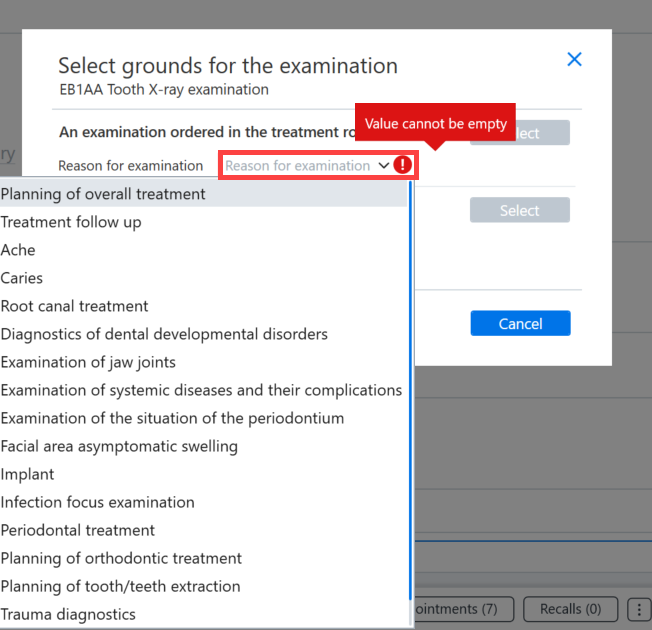
Select the reason for the imaging examination, for example Planning of overall treatment.
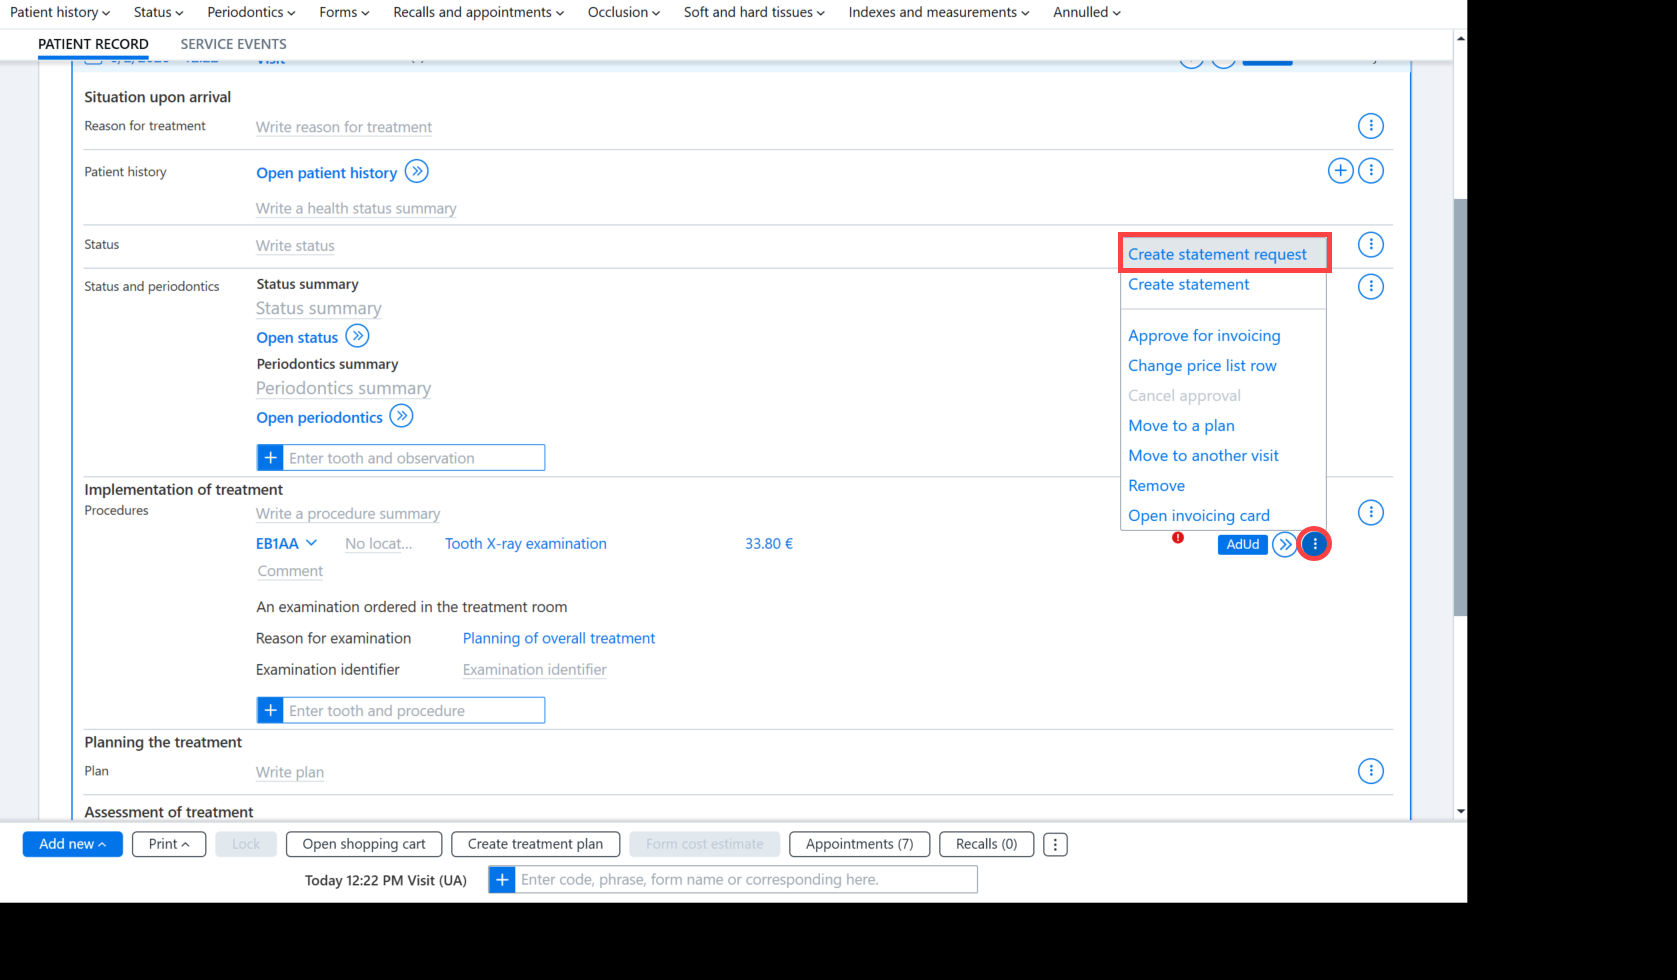
Click the Additional functions button at the end of the procedure row and select Create statement request.
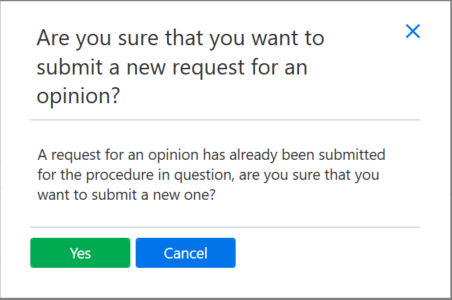
Please note: If a request for a statement has already been created for the procedure, AssisDent will ask for confirmation from the user before creating the request for a statement. From the dialog box, you can select either Yes or Cancel.
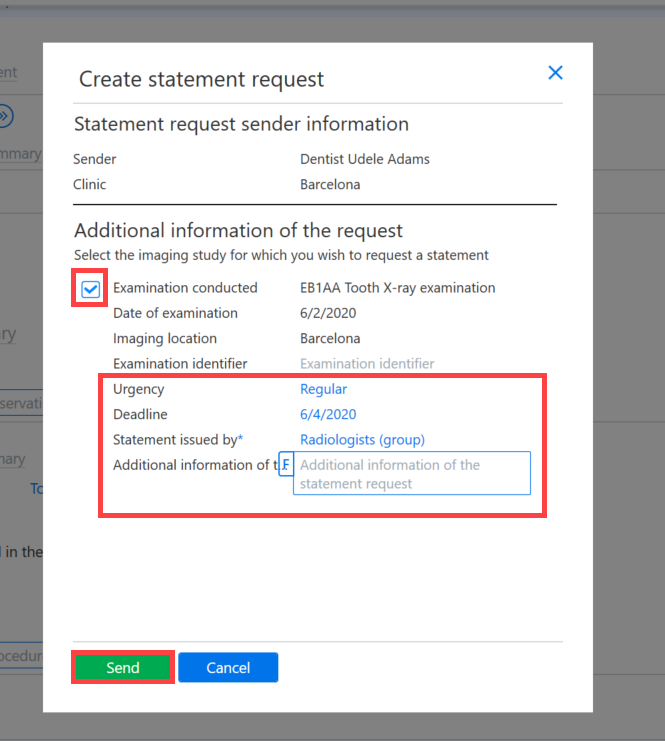
Write down the information needed for the radiologist to make the statement, such as the patient history, in the field labeled Additional information of the statement request. Regular is the default importance level for a statement request, and this can also be changed to Urgent. Urgent requests for a statement are displayed in the radiologist's job queue with an orange exclamation mark. The author of the statement can be set in the field labeled Statement issued by. Click the Send button to then send the request to the Radiologist's job queue.
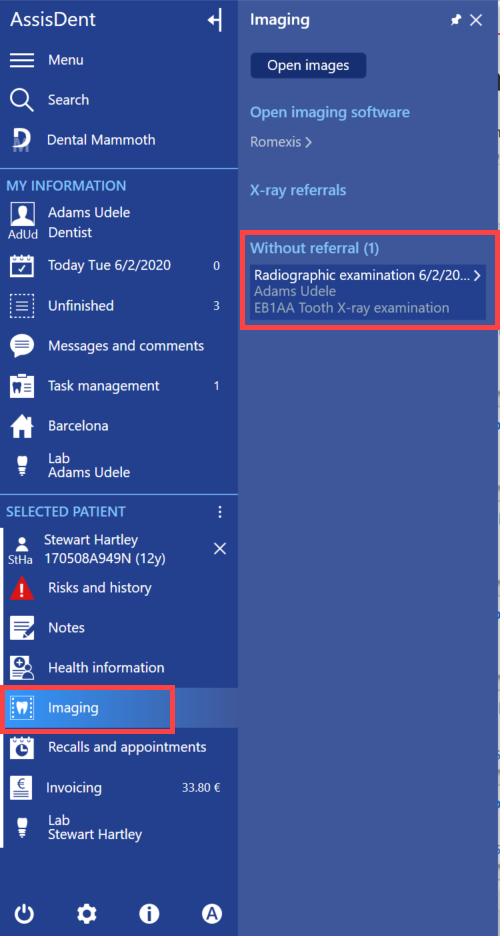
The requests for a statement that are in the Radiology job queue are displayed on the patient card control panel.
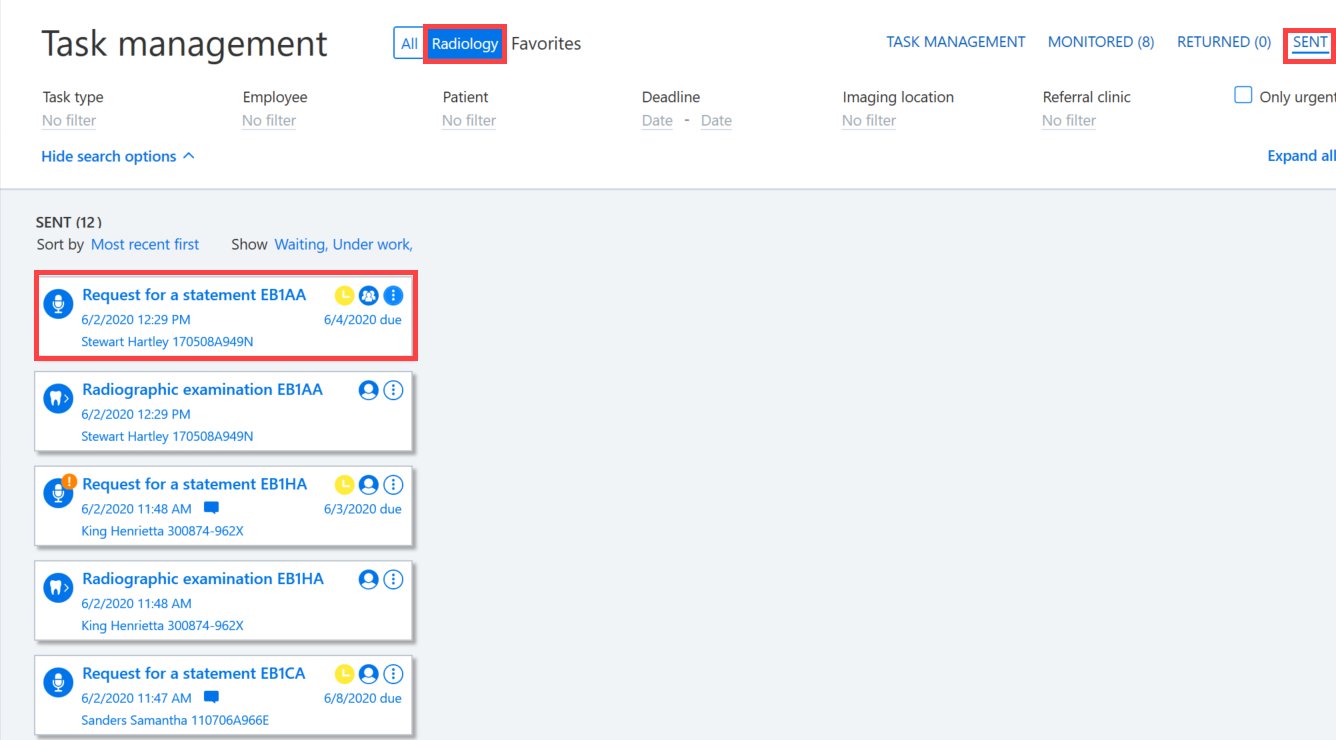
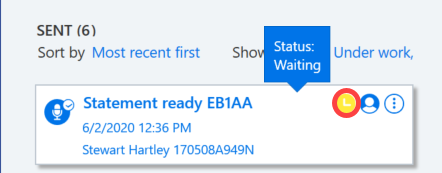
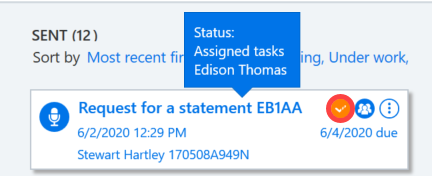
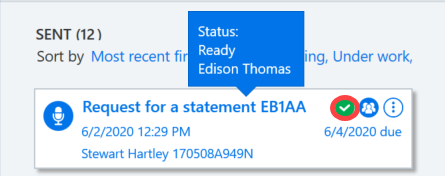
A clinician who has submitted a request for a statement can monitor the status of the request in their own job queue by selecting the Sent tab. The status and symbol of the request for a statement changes as the request progresses through the job queues.
-
- A yellow symbol after the statement indicates that the task is waiting for its recipient to assign it to themselves.
- An orange symbol indicates that the task has been assigned.
- The green symbol indicates that the task is ready.
Request for an statement on an x-ray referral examination
If the imaging examination is not performed as a so-called treatment room examination, an X-ray referral is first prepared.
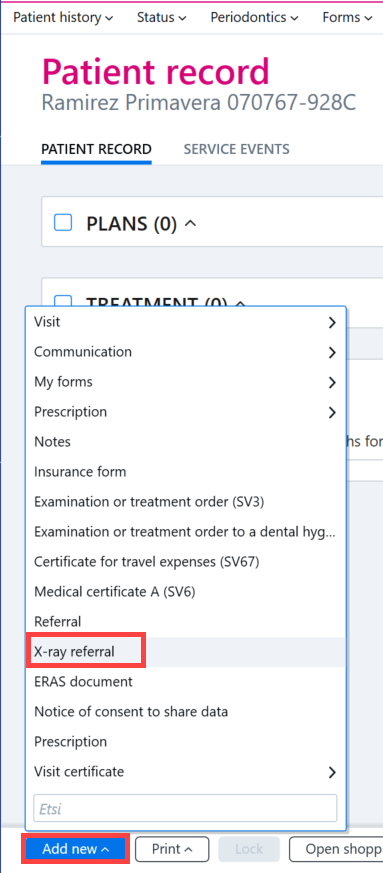
First, create a new X-ray referral from the patient record by clicking the Add new button and selecting X-ray referral.
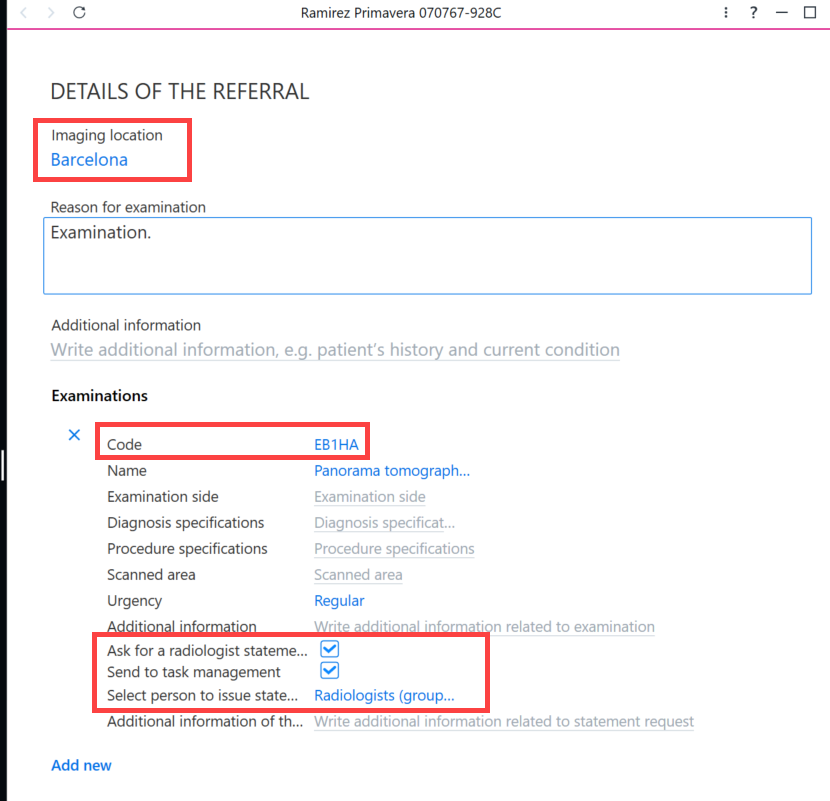
In the dialog box that opens, check the box Ask for a radiologist statement and Send to task management. The options for panorama (optg) and conical scanning images are automatically selected, while the other options must be set manually. Check that the correct imaging location has been set for the referral. You can also set within the dialog box the person to issue the statement and the level of urgency as well as adding any necessary additional information. The options for the person to issue the statement must first be created as employee groups, such as radiologists.
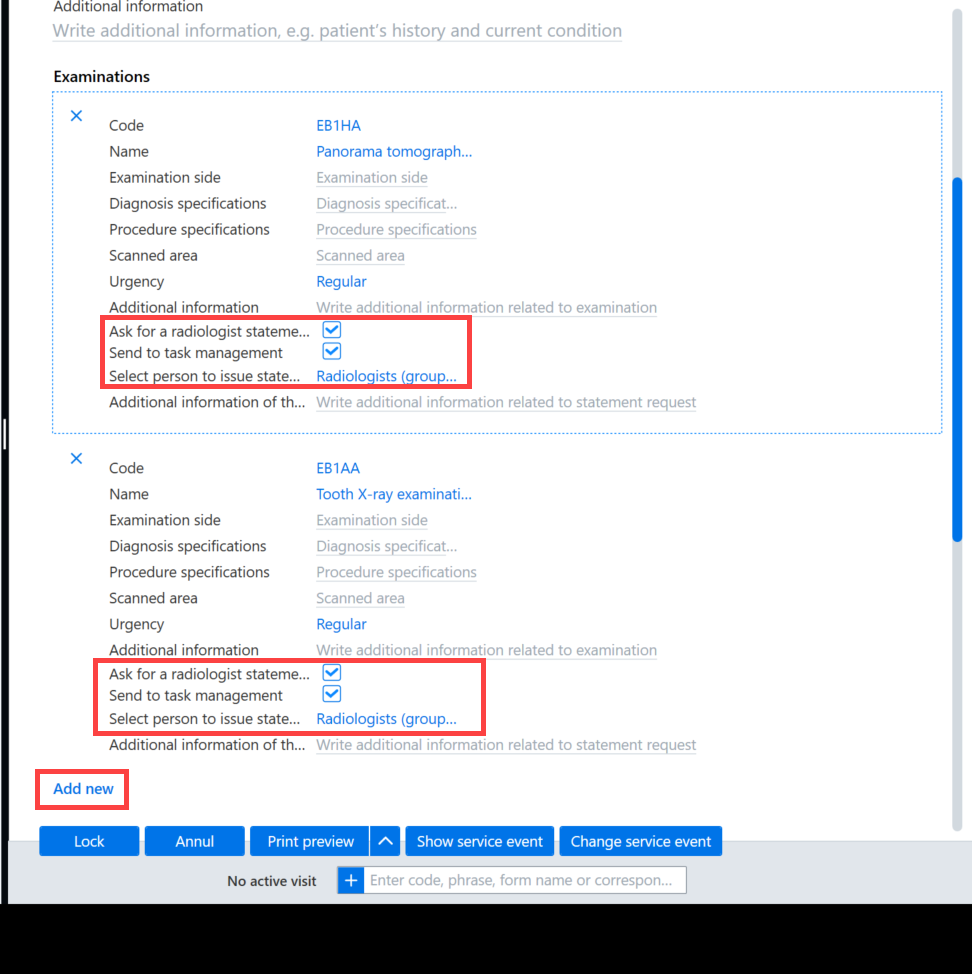
If a second examination is to be added to the referral, you can add this by selecting Add new, and then selecting for the examination the options Ask for a radiologist statement and Send to task management. Please note: When a request for a statement is made using an X-ray referral, the request appears in the radiologist's job queue only once the visit in the patient report has been locked.
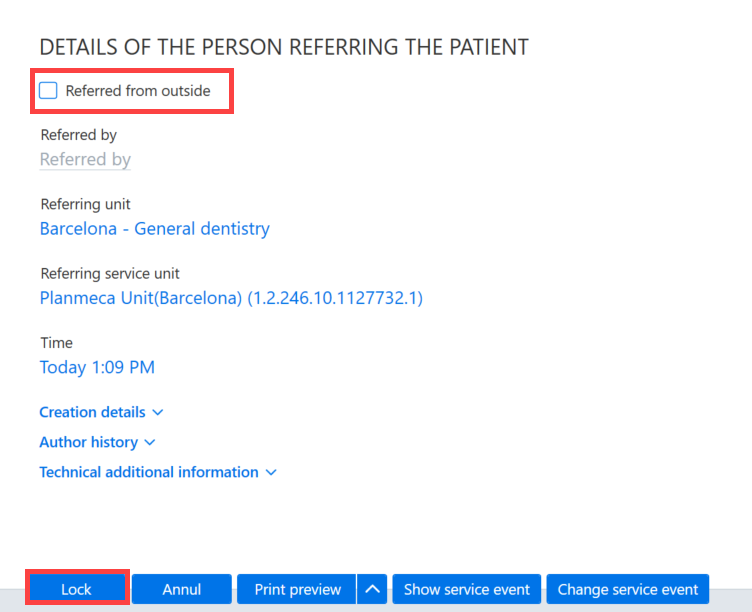
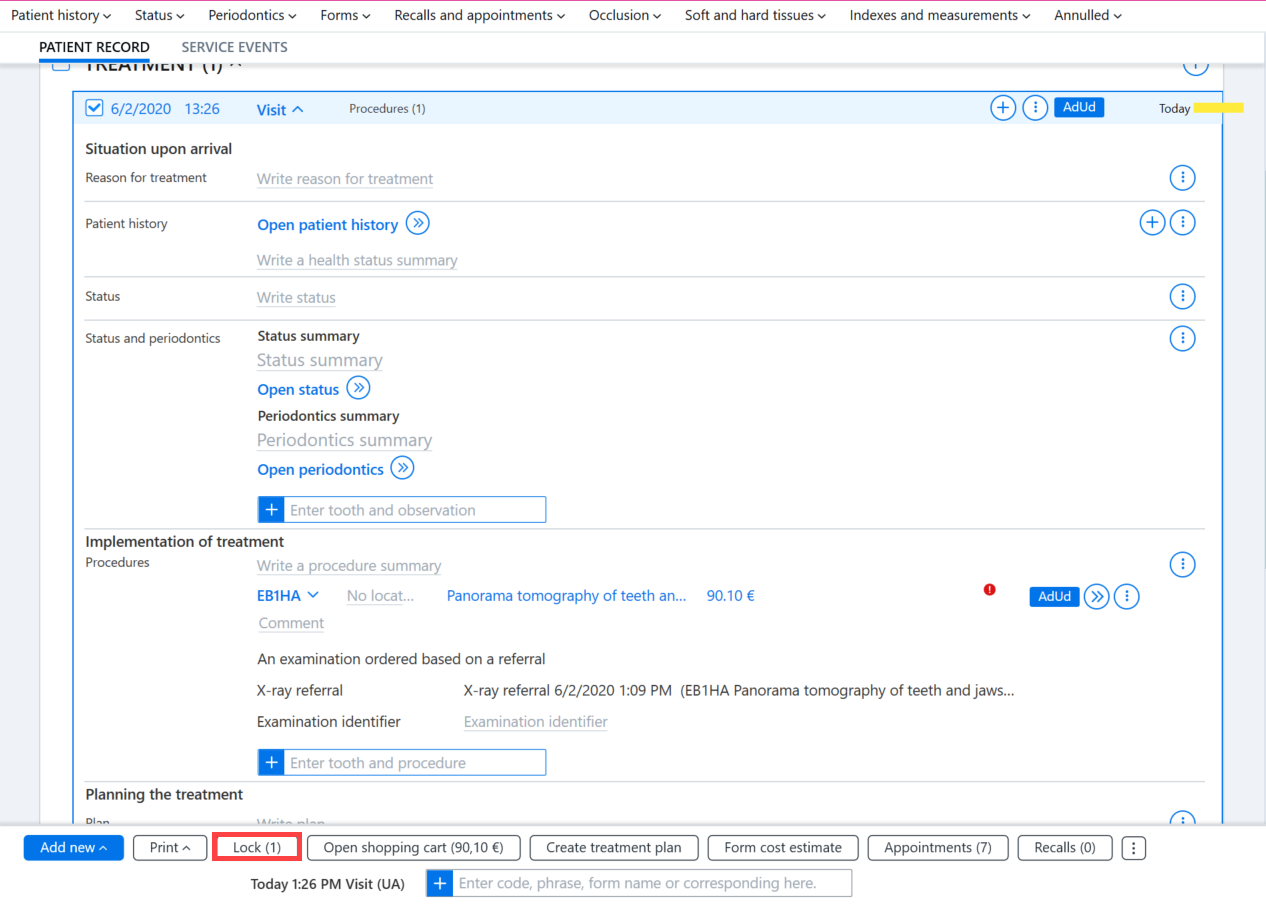
Lock the referral using the Lock button once you have added any necessary additional information, such as an external referring unit.
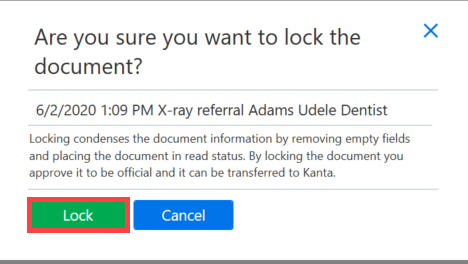
Then, lock the request by selecting Lock. Please note: In a request for a statement made using an X-ray referral, the task request is formed in the radiologist's job queue only when the visit is locked.
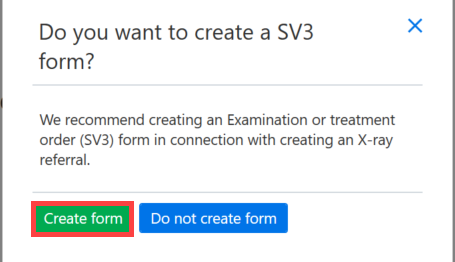
To finish, an SV3 form is created if needed. You can cancel the creation of the SV3 form by selecting Do not create form.
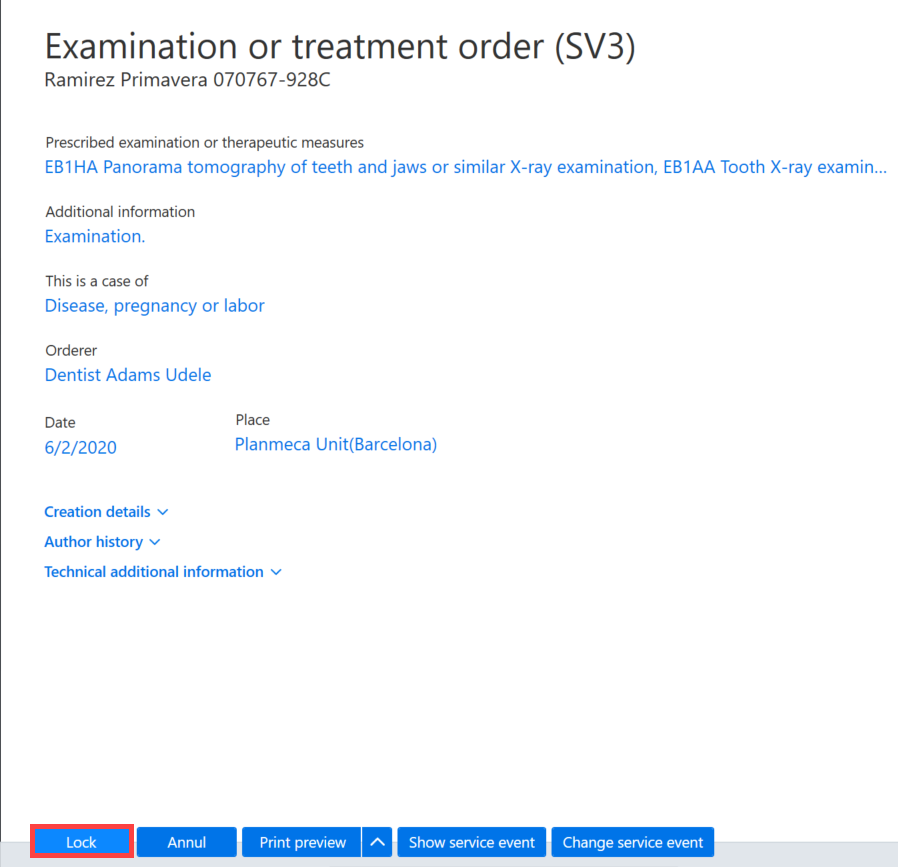
The SV3 form can be locked by clicking the Lock button.
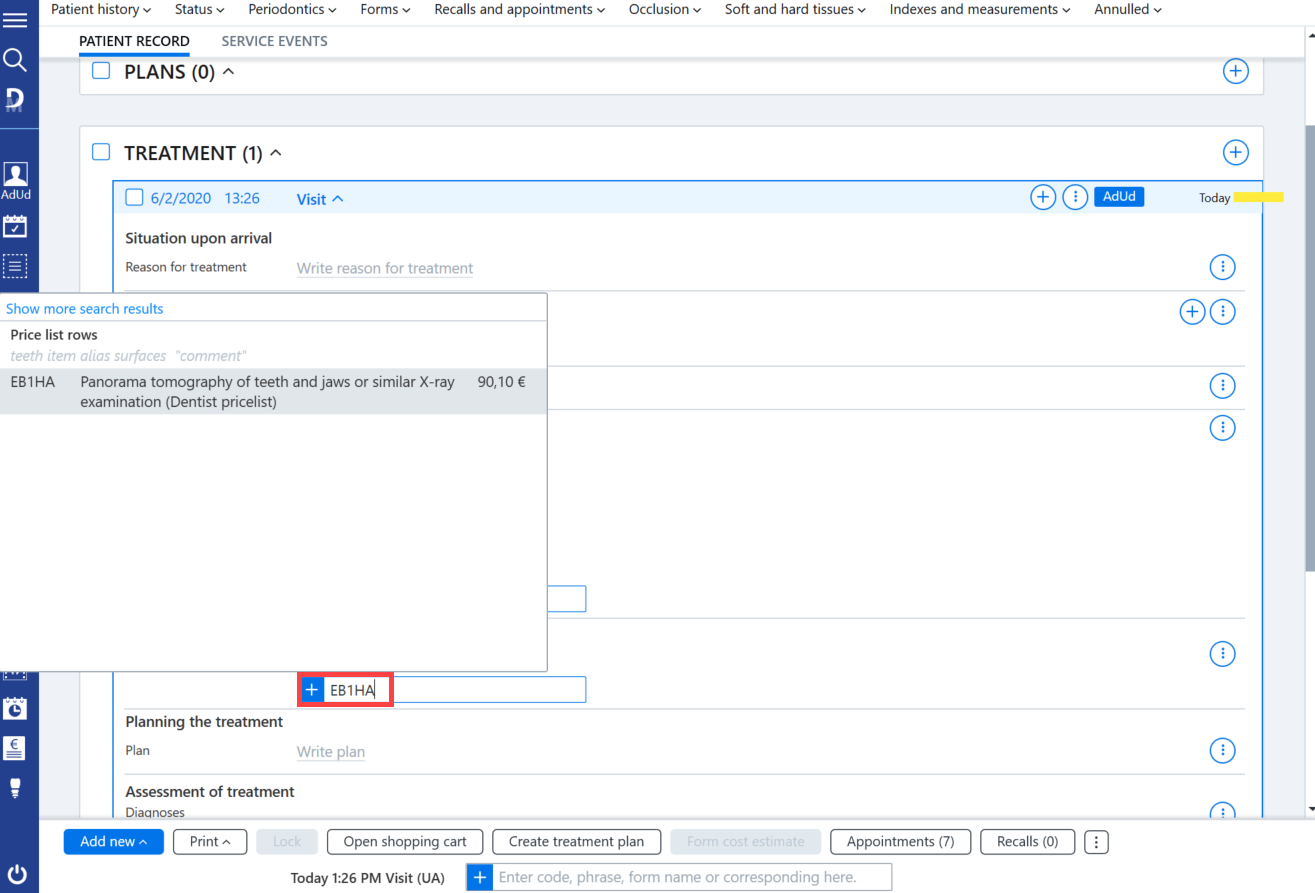
Once a referral is created, it can be attached to the treatment from the patient record by entering the RTG procedure recorded in the referral into the field Implementation of treatment.
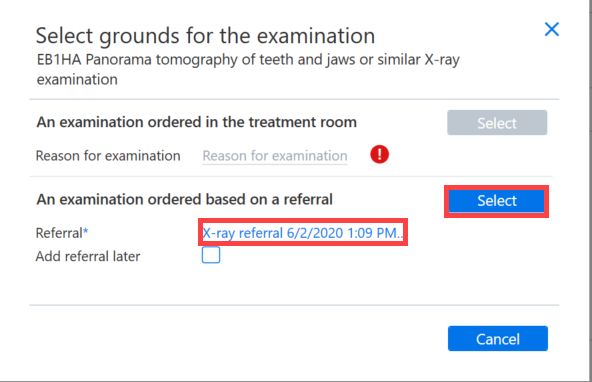
A new dialog box then opens up asking you to select the grounds for the examination. In the section labeled ‘An examination ordered based on a referral’, select the appropriate referral by clicking Select.
Next, lock the visit in which the X-ray treatment and referral have been entered by selecting Lock. Once the visit is locked, the request for a statement is sent to the radiologist's job queue.
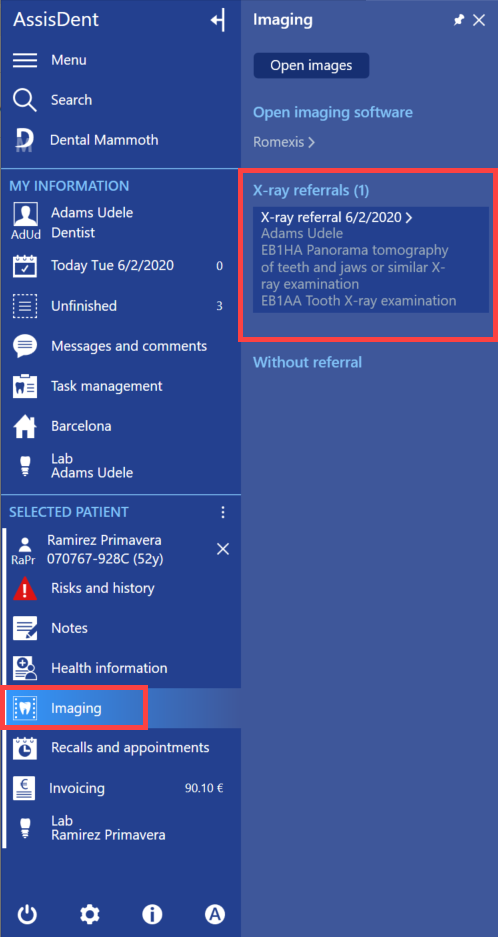
The status of the patient's referrals can be monitored from the patient's control panel under Imaging.
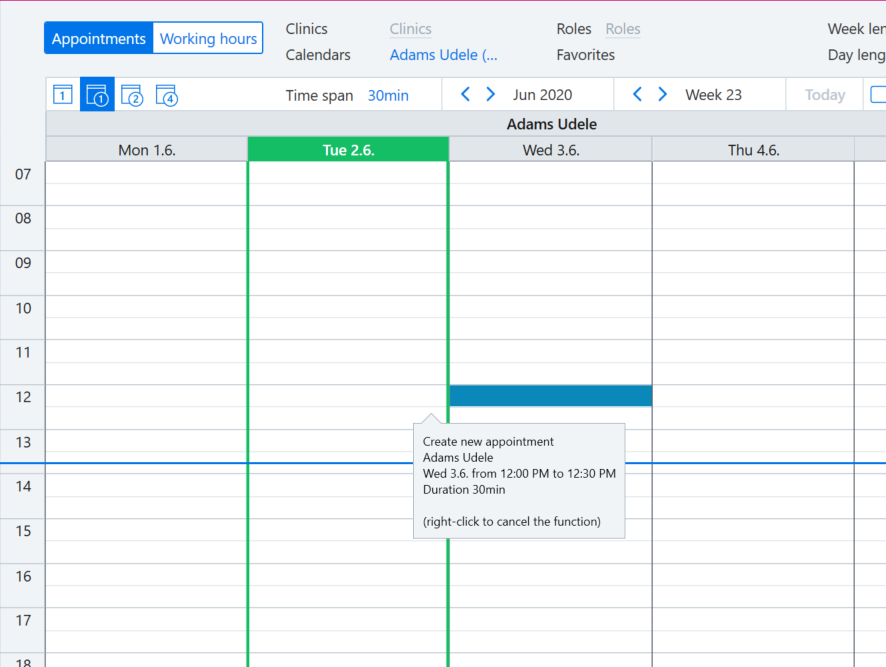
Attaching a referral to an appointment
First, create an appointment in the calendar by dragging the mouse over the desired time period.
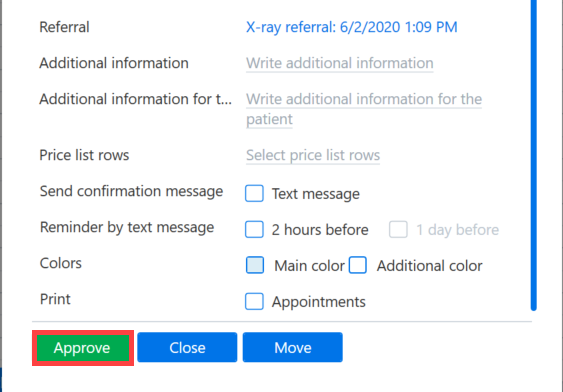
Add the patient’s X-ray referral to the Referral field in the dialog box that opens. This makes it easy for the person conducting the imaging examination to find it.
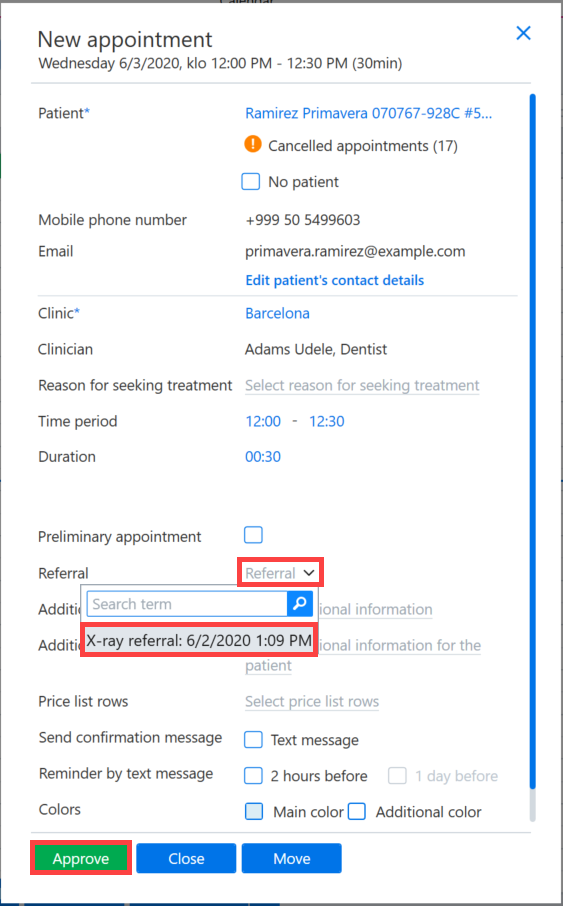
Finally, approve the appointment by clicking Approve. The referral will now be attached to the patient appointment.
Carrying out a referral-based imaging examination that requires a statement
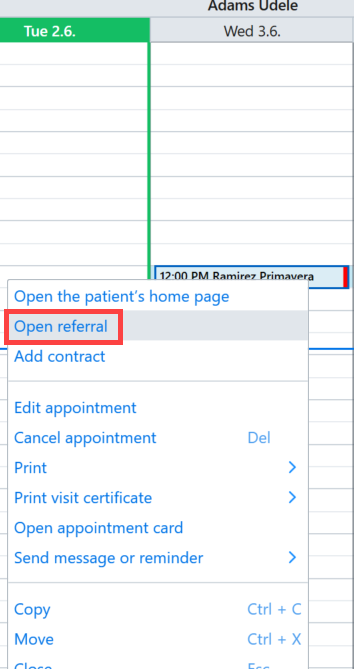
Open the patient's referral from the patient's appointment by clicking with the right mouse button and clicking Open referral. Alternatively, the referral can be opened from the patient’s control panel under Imaging.
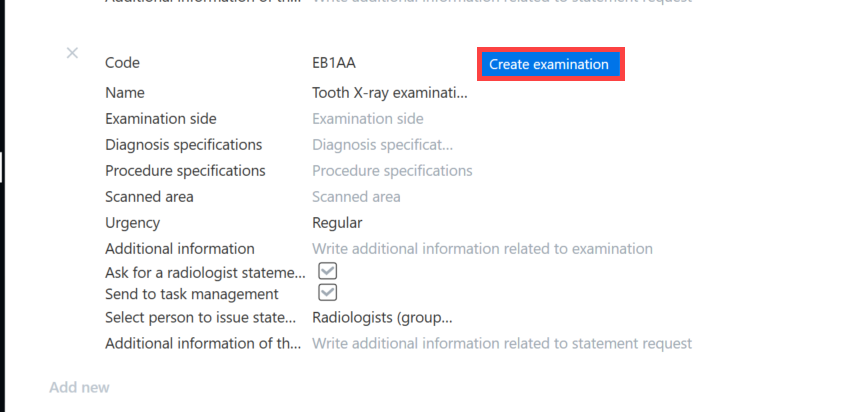
The X-ray referral will now open up on the right. Verify that the information in the referral is correct and accept the examination and the necessary images for the patient by clicking on the Create examination button.
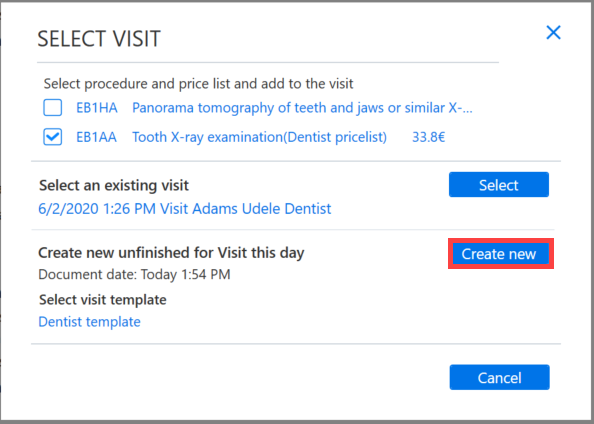
Next, you can select which imaging examinations to enter for the visit. If you want to create an entirely new visit, click the Create new button. Here you can also change the desired template in the Select visit template field.
If you want to attach imaging examinations to an existing visit, click Select. The existing visit is shown in blue in the dialog box.
Next, check the procedures and price lists and choose whether they should be added to the selected visit. Please note: In a request for a statement made using an X-ray referral, the task request is formed in the radiologist's job queue only when the visit is locked.
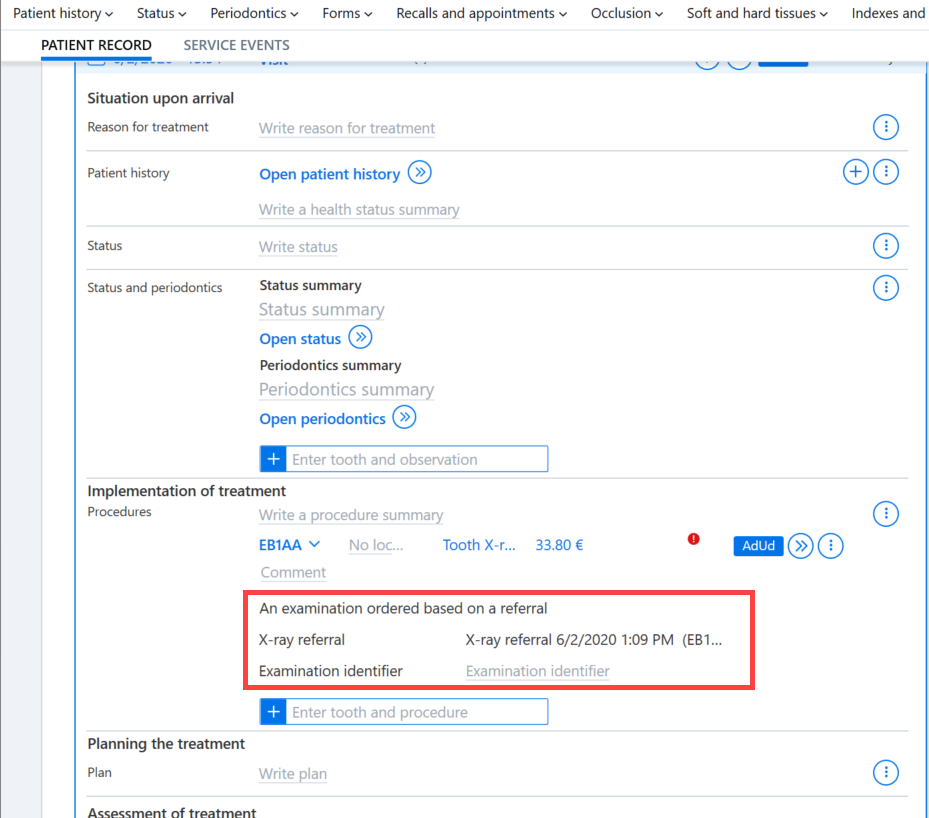
The referral will now show the date and the person performing the examination in blue under Performed examinations.
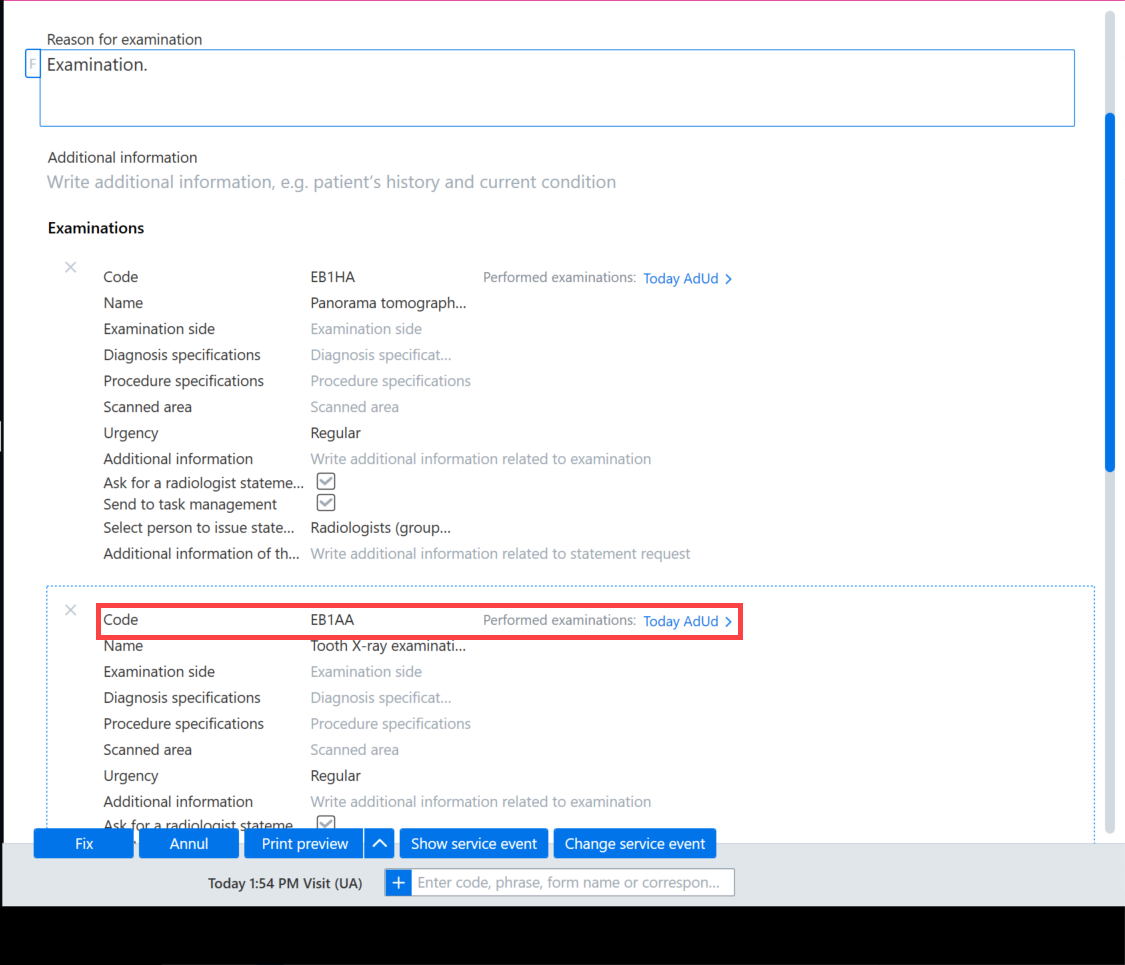
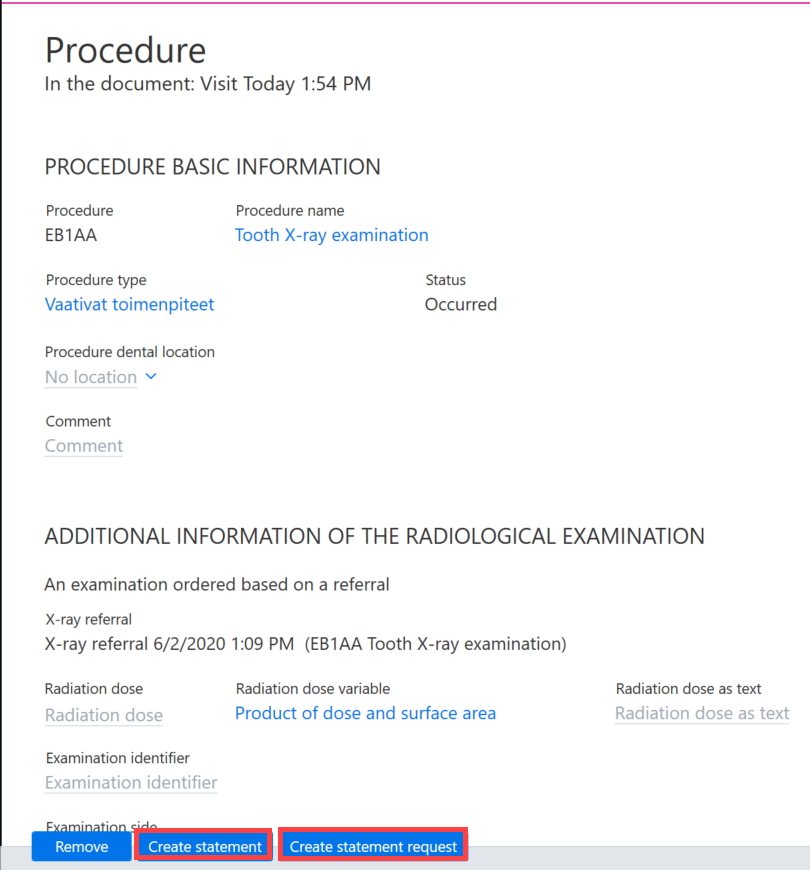
By clicking on the blue arrow shown after the referral, you can access the procedure card and, if necessary, create a request for a statement.
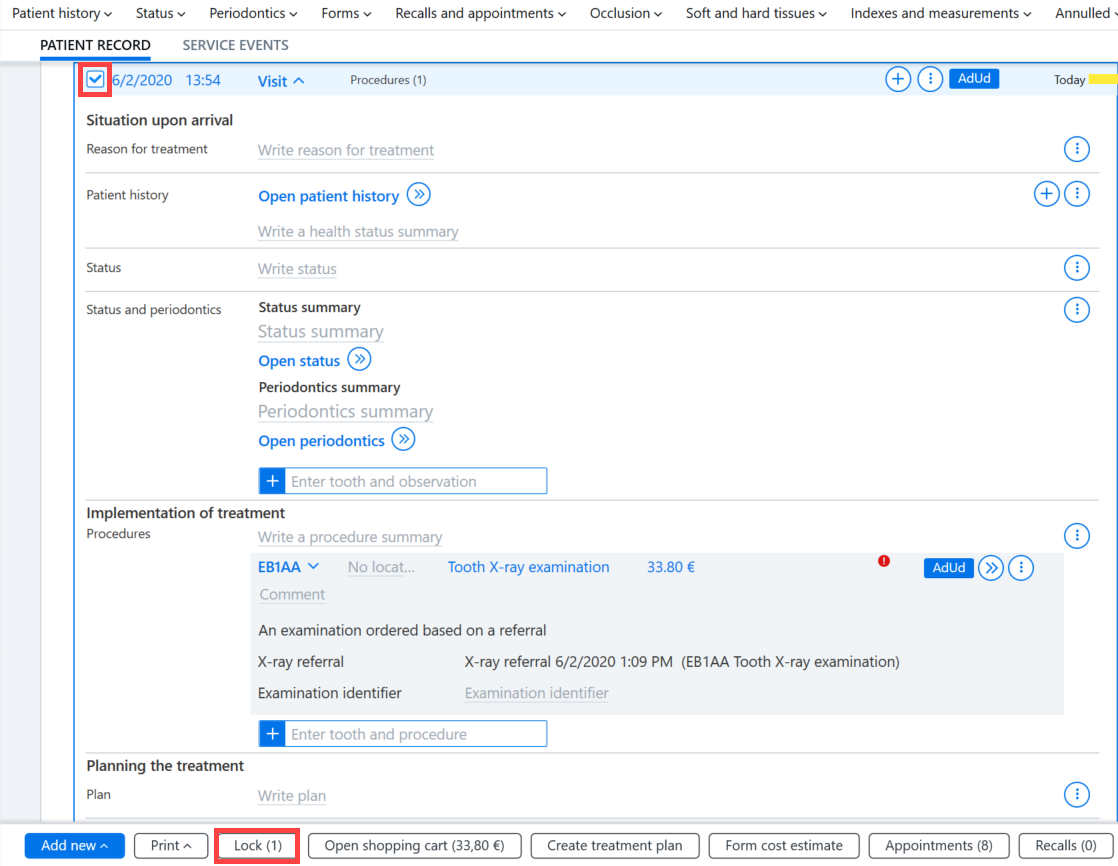
Next, lock the visit for which the X-ray procedure and referral have been recorded by clicking Lock. Please note: In a request for a statement made using an X-ray referral, the task request is formed in the radiologist's job queue only when the visit is locked.
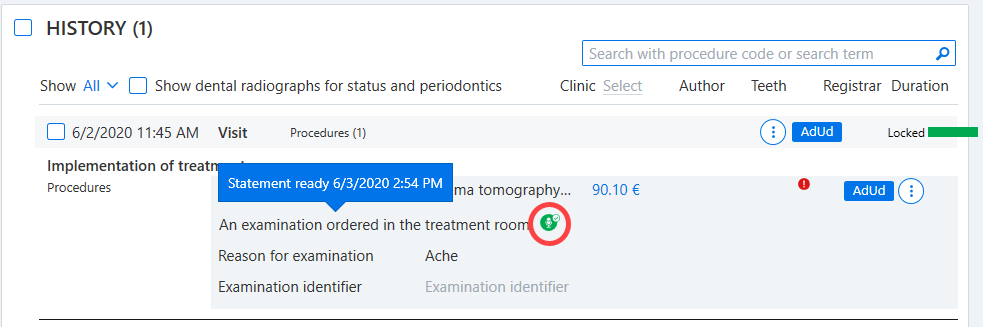
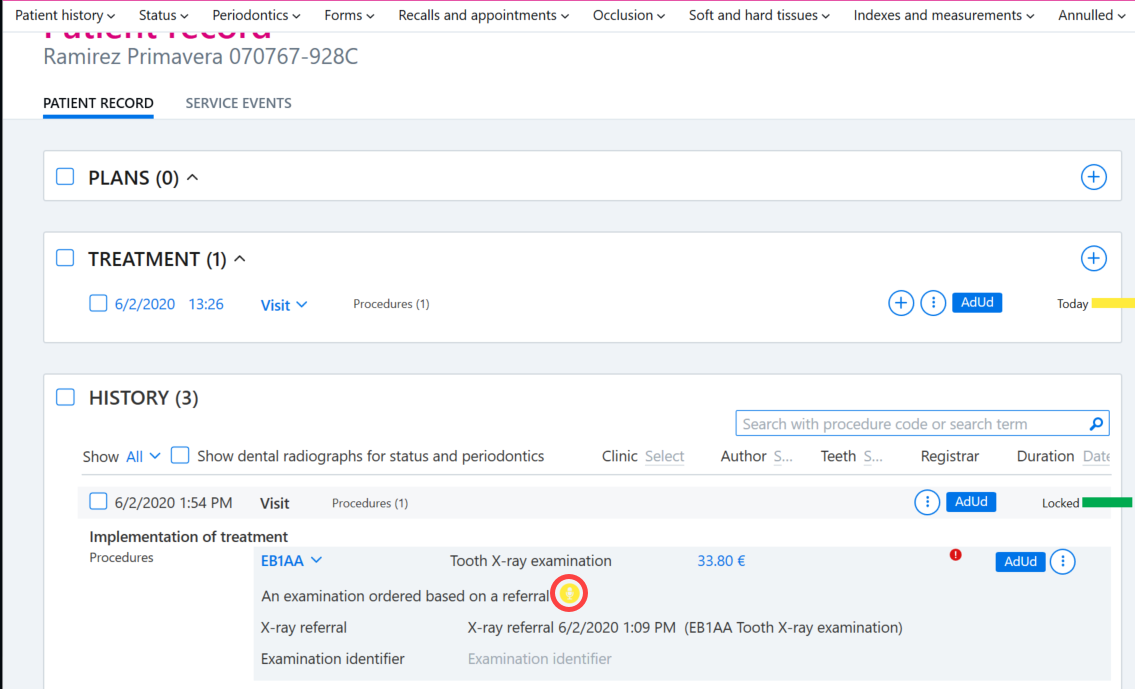
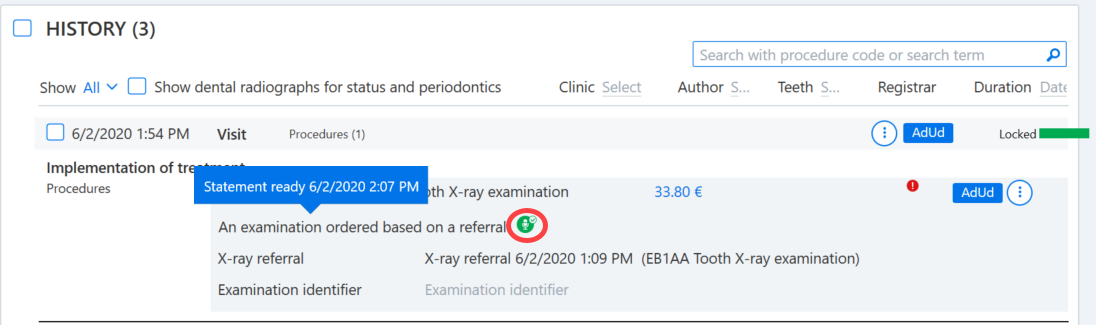
A green icon appears in the patient record indicating that the image is ready. The yellow icon indicates that a request for his statement has been made.
Making statements on x-ray images from the radiology job queue
Click the Task management button to go from the control panel to the job queue. The additional menu that opens up shows all the received statement requests. The job queue can be opened by clicking the Open radiology task management button.
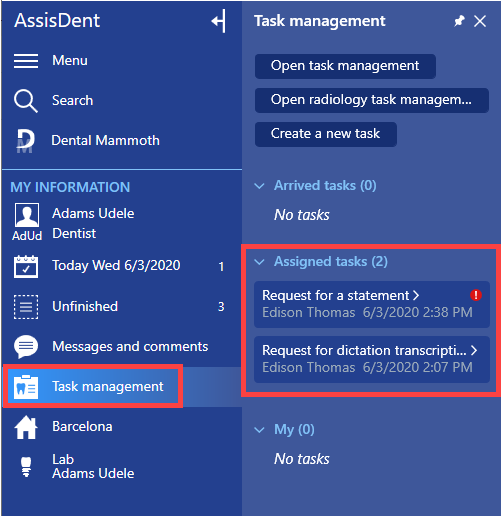
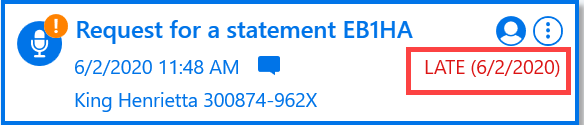
Urgent tasks are highlighted with an orange exclamation mark.
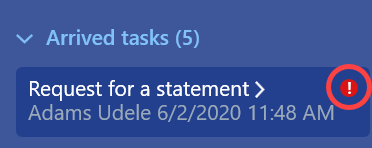
If the deadline set for the statement request has already passed, the task is marked in red as late and the expired deadline is shown.
You can use the Radiology job queue to filter tasks using search criteria. Click Show search options to view the search criteria.
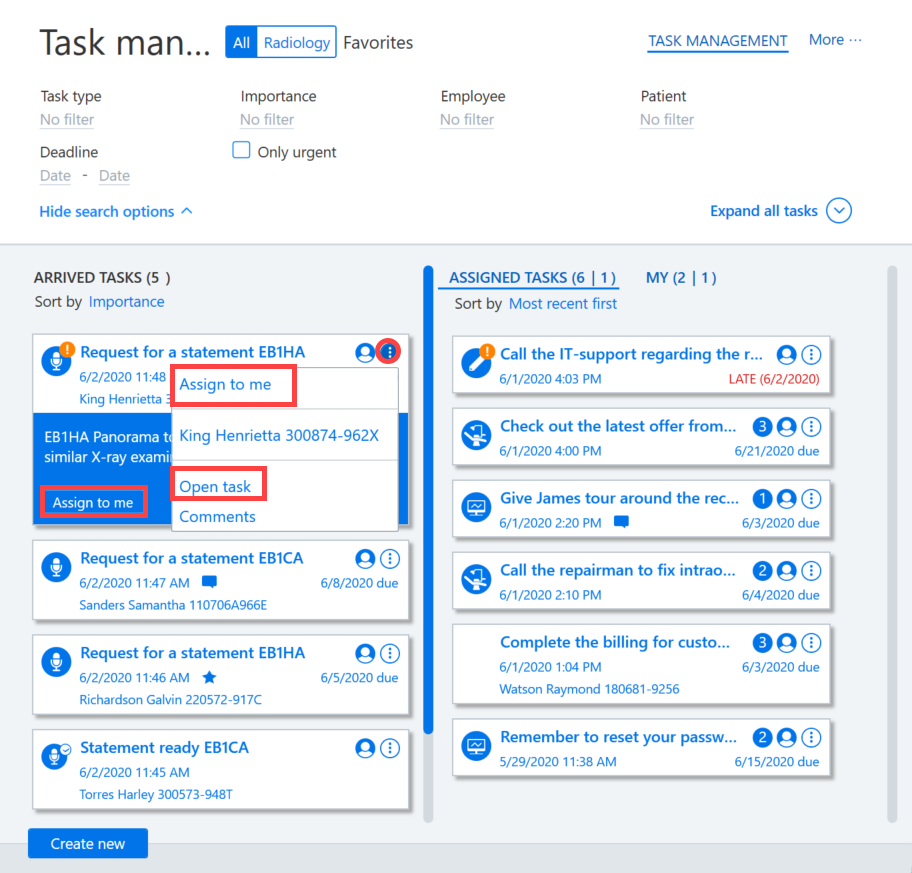
Job queue answer requests can be filtered, for example, by employee, referring clinic, or patient. You can also select to display only statement requests marked urgent with a referral by selecting Only urgent.

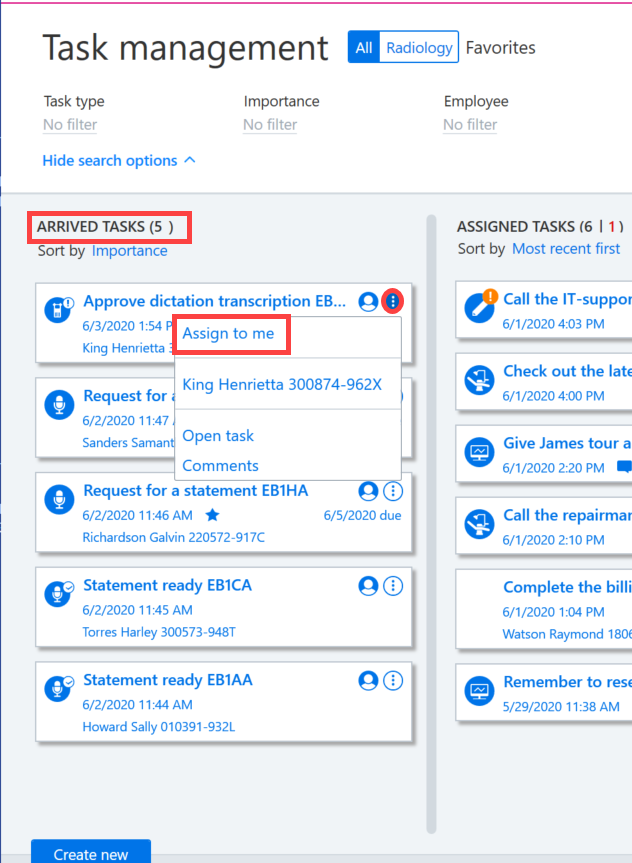
Select the desired request for a statement, click the Additional functions button and select the desired function. If you want to create a request for a statement, assign the request to yourself by selecting Assign to me. If you want to view the statement request, select Open task.
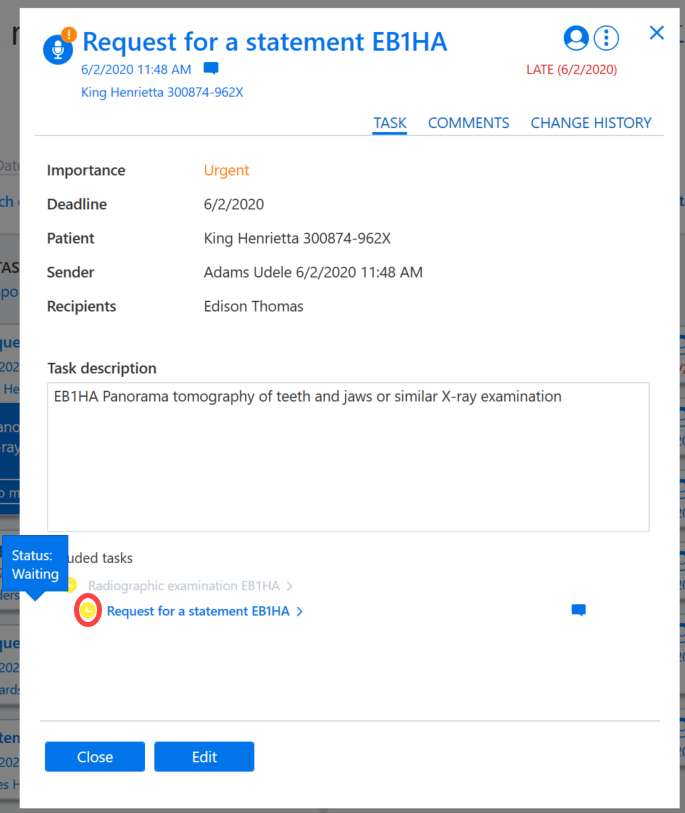
After selecting Open task, you are able to view comments and recipients for the request. In addition, the tasks included in the request for a statement are marked with yellow icons. When you hover over an icon, it indicates the status of the request for a statement.
To issue a statement yourself for one of the statement requests, select Assign to me. The statement request is then moved to the In progress section of the job queue, and the Create imaging study statement dialog box opens automatically. Next, review the details of the referral, examination and request for a statement. By clicking Additional information, you can obtain more detailed information about the examination for which the statement is being given.
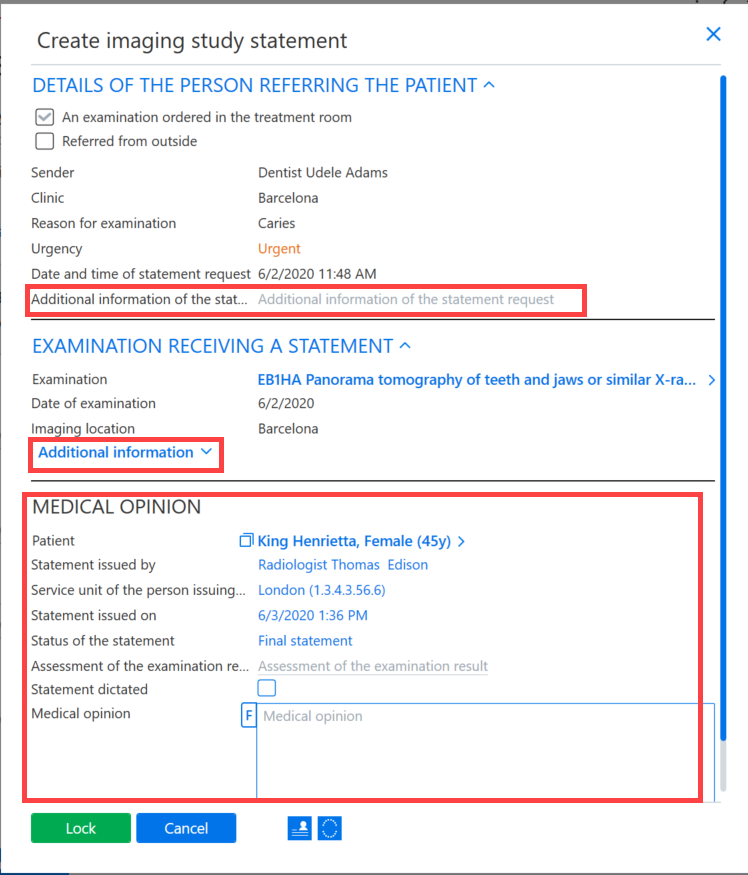
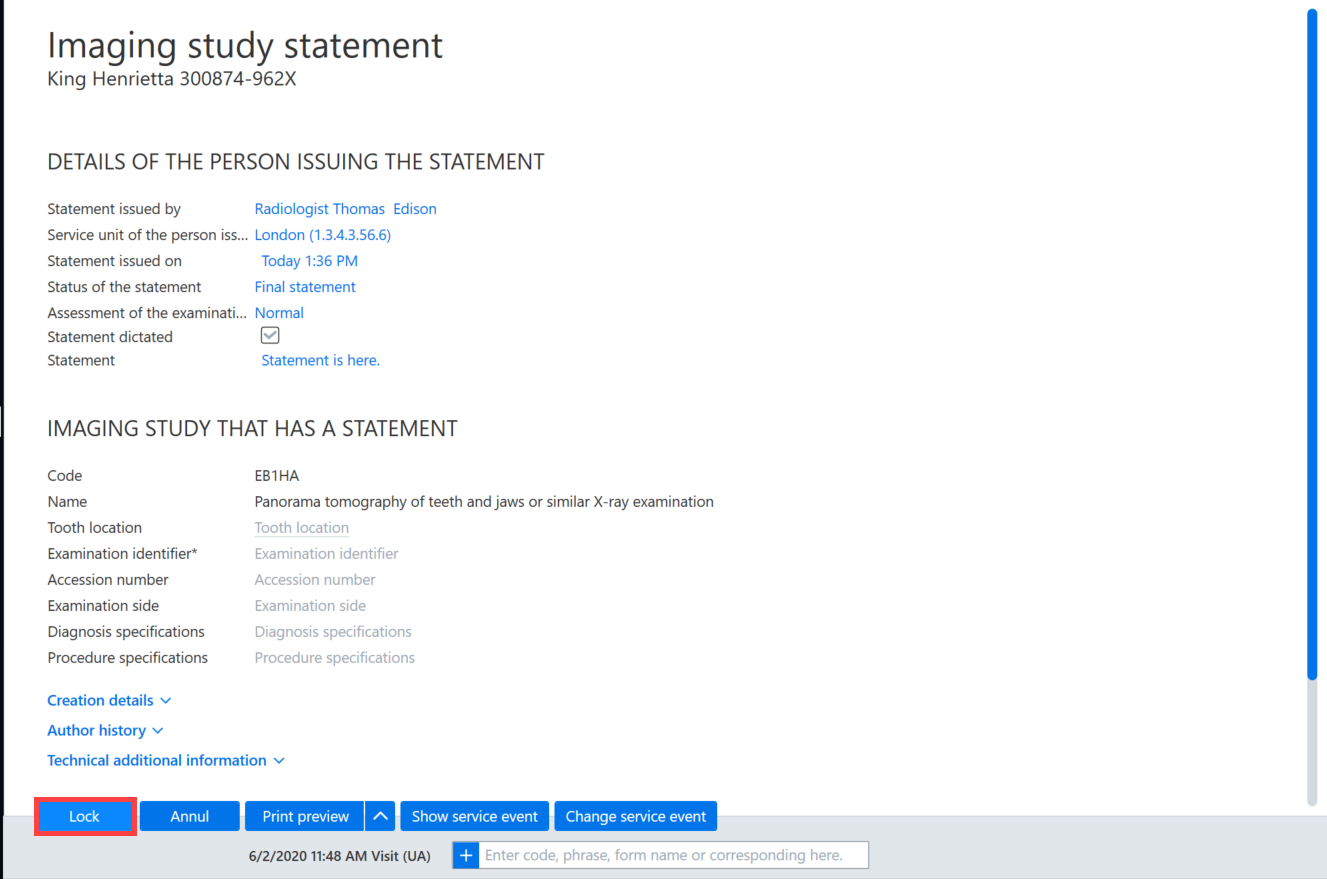
The statement is entered into the fields labeled Status of the statement and Assessment of the examination result. If the statement is being dictated, select Statement dictated. Enter a written statement into the field labeled Medical opinion. When you click on the square in front of the patient's name, the patient’s personal identification number is copied to the clipboard, from where it can be pasted into the patient search box for the desired X-ray system by clicking the right mouse button.
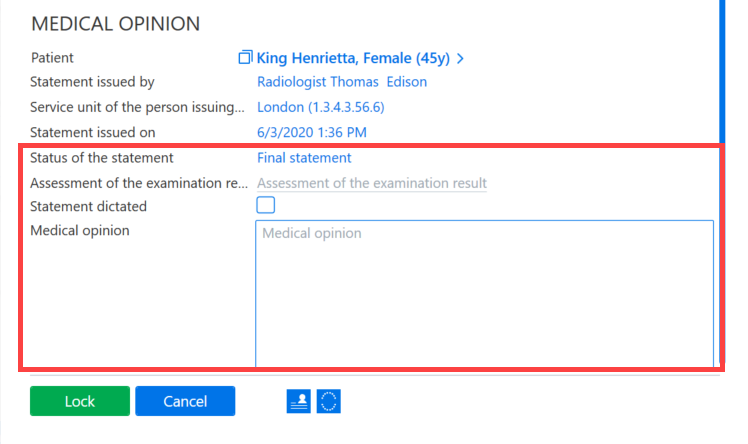
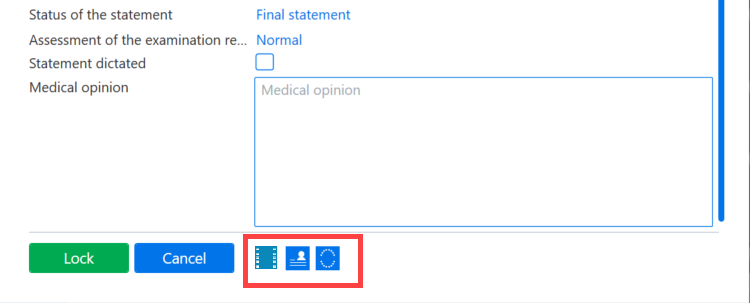
Where needed, you can access the patient's images (Romexis), patient record or dental arch directly from the statement by clicking on the icons. When the answer is complete, click the Lock button.
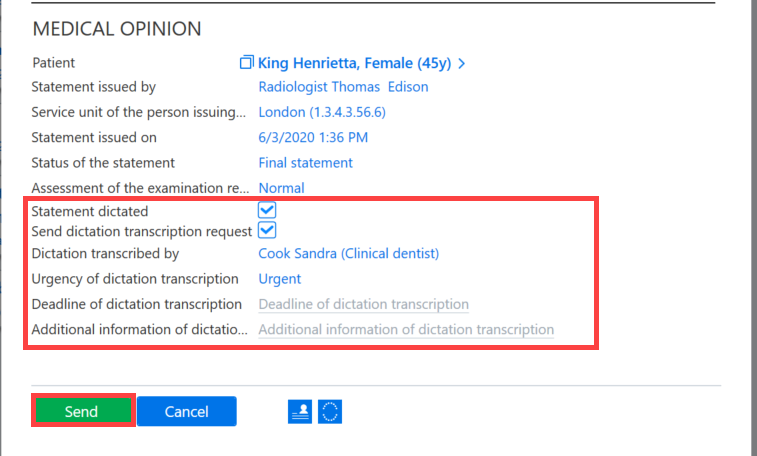
If you have selected Statement dictated, add also the dictation transcriber and other additional information. The dictation is sent to the dictation transcriber's job queue by clicking the Send button.
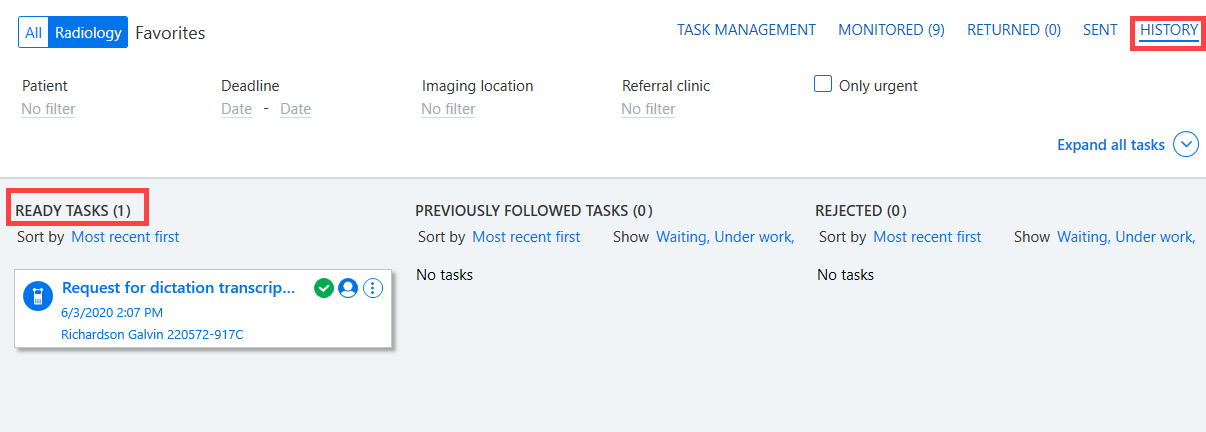
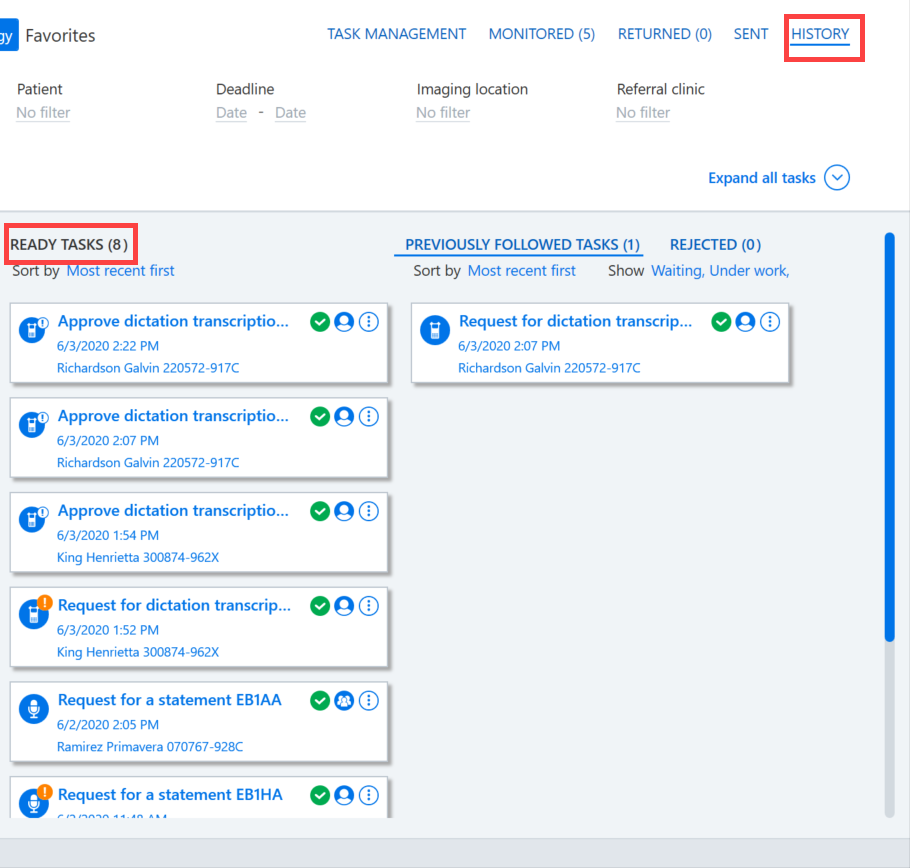
A statement which is ready in the Radiologist's job queue is transferred to the History section. If desired, you can also view the dictation transcription requests in the History section of the Radiology job queue.
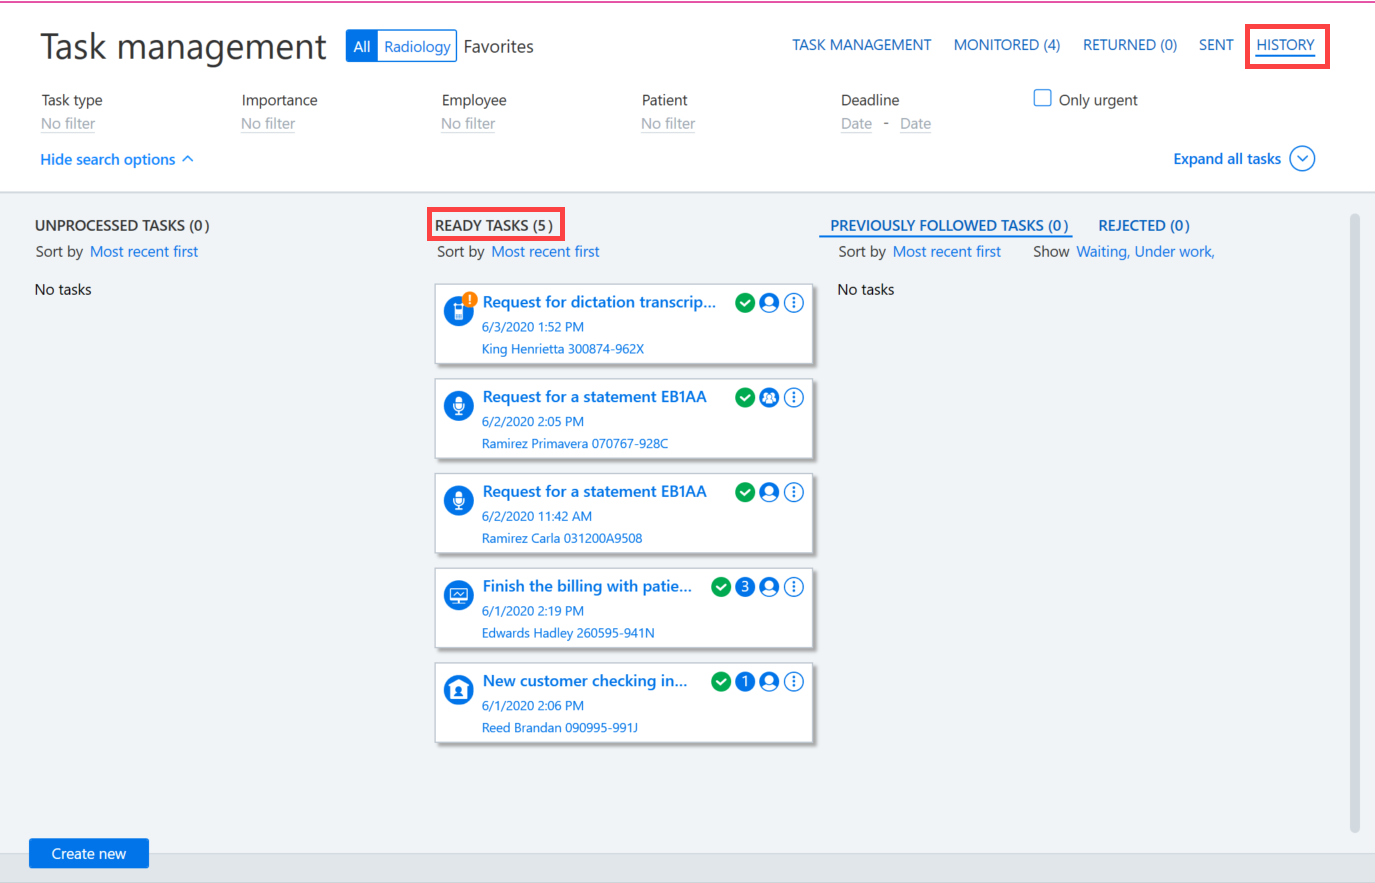
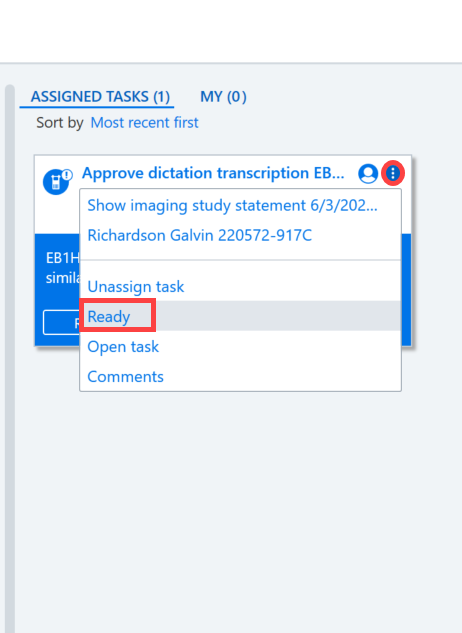
If the statement has been dictated, the statement will be returned after being transcribed in order to be approved by the radiologist. Take on the task Approve dictation transcription and check through the transcription.
To finish, lock the imaging examination statement by clicking the Lock button. AssisDent will now automatically generate a Statement ready task in the job queue of the dentist who created the statement request, and they can then mark this as read.
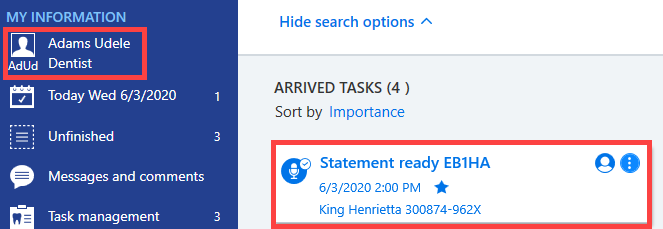
Please note: If you select Ready in the job queue, this does not also lock the imaging examination statement. Locking must be done separately. Selecting Ready simply moves tasks to the History section in the job queue.
Dictation transcriber job queue
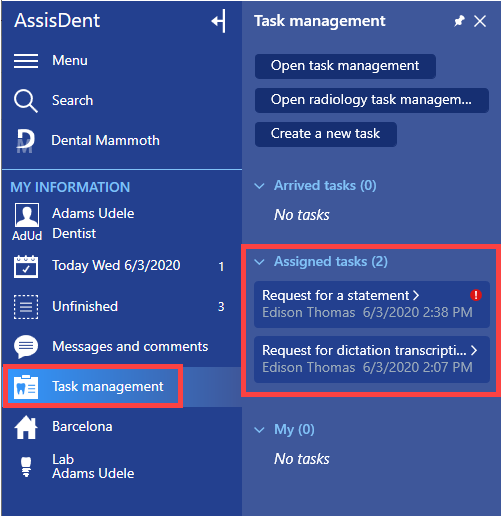
Dictation transcription requests can be found in the job queue's assigned tasks.
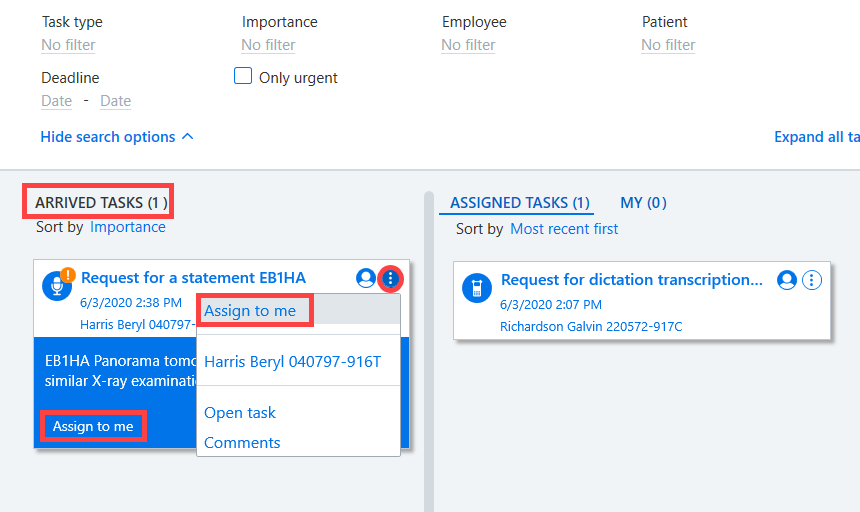
To take on a transcription request, click the Additional functions button and select Assign to me.
Enter the transcription of the dictation into the Statement field. Finally, approve the completed transcription by clicking the Lock button.
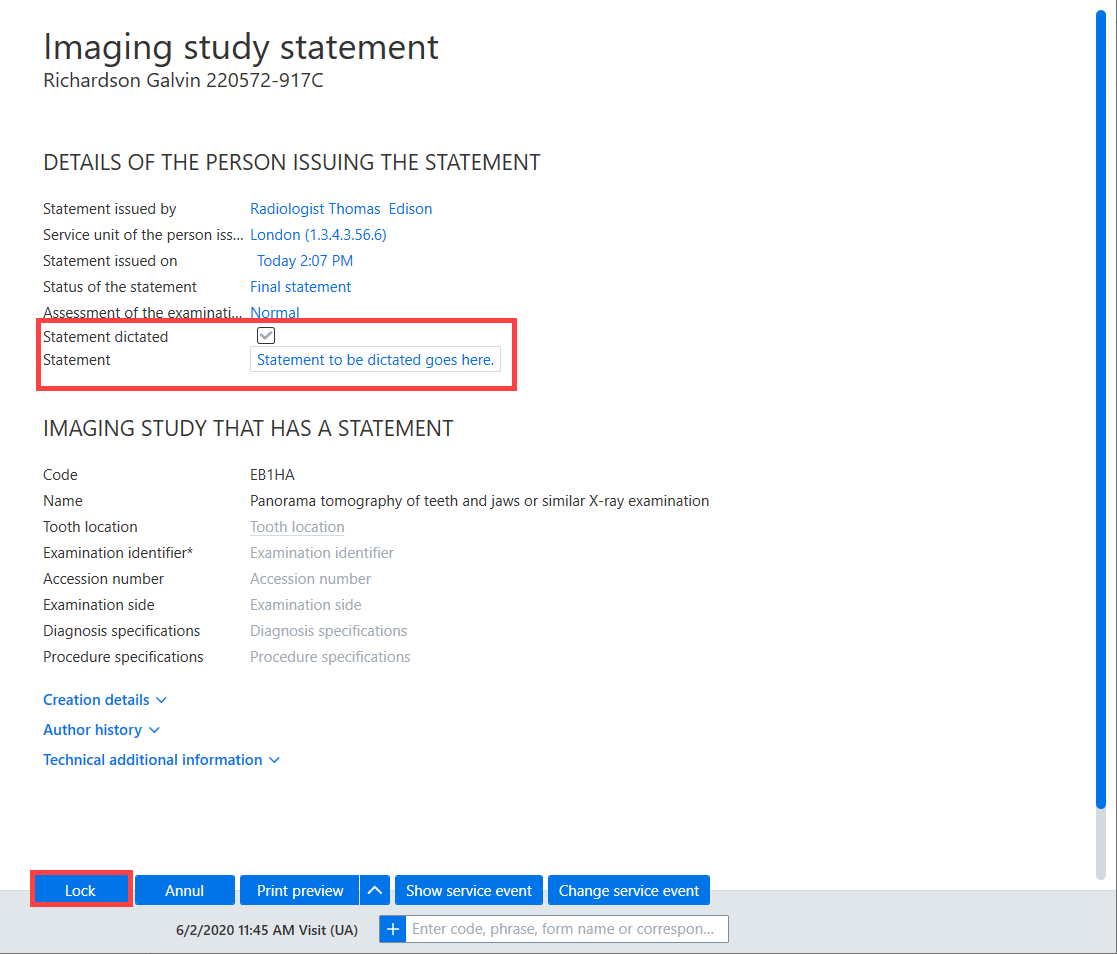
Confirm the completion of the transcription by clicking again the Lock button.
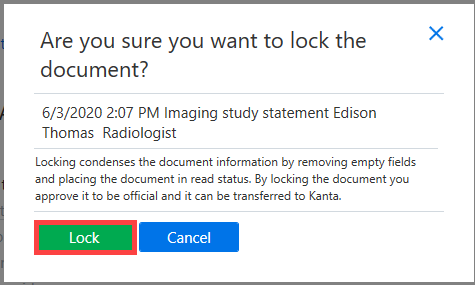
The dictation transcription request is now moved to Ready tasks in the dictation transcriber job queue. Before the statement is returned to the dentist, it must first be approved by the radiologist.
Completed statements
A completed statement is displayed as ready in the job queue of the dentist who made the request for the statement.
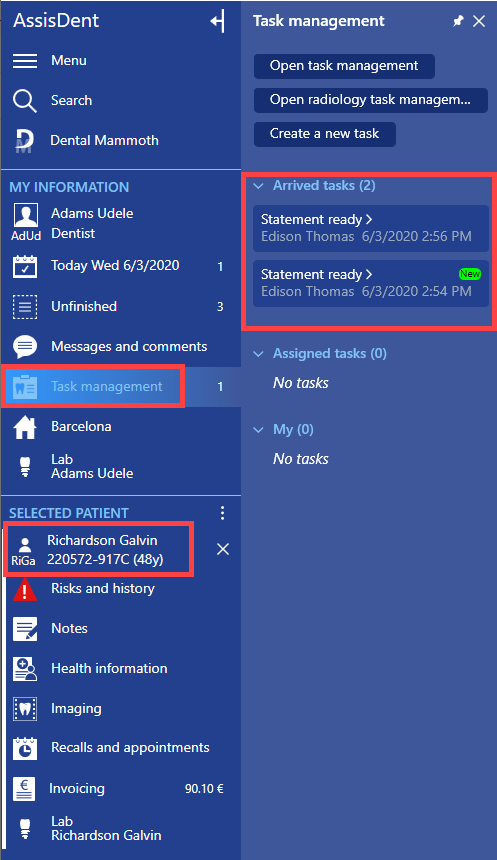
By selecting Assign to me, the completed statement can be reviewed.
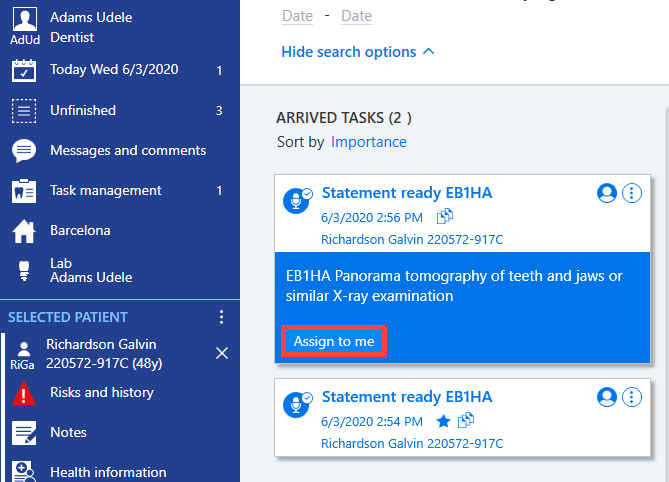
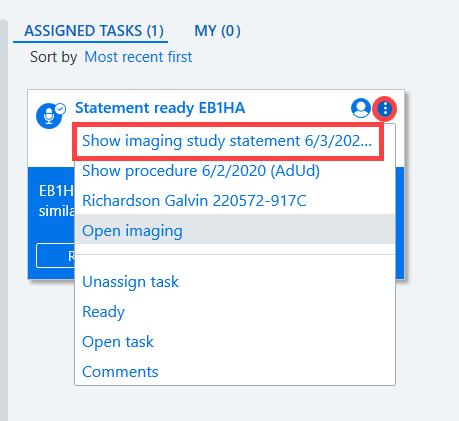
Next, click the Additional functions button and select Show imaging study statement.
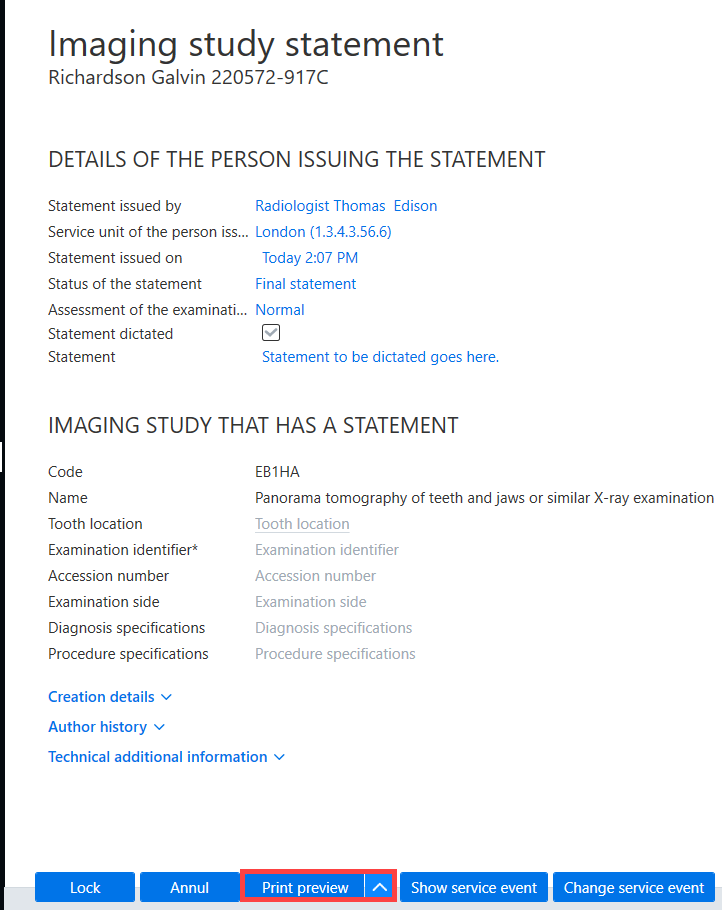
If needed, the statement can also be printed by clicking the Print preview button. By first clicking the arrow key, you can also print the statement without previewing it.
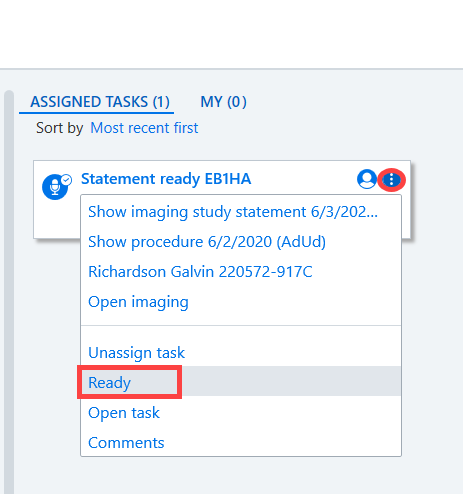
Once the clinician has read the statement and selected Ready, the statement is acknowledged as read. The completed statement is now transferred to the History section of the clinician's job queue.
In the patient record, a completed statement is marked with a green icon. The statement can be opened in the patient record by clicking the Additional functions button at the end of the Imaging study statement row and then selecting Open document. The green icon represents a completed statement/image, and the orange icon represents a pending request for a statement.