These instructions contain all the most important matters related to patient invoicing in AssisDent. The links then provide more detailed descriptions and instructions for each topic.
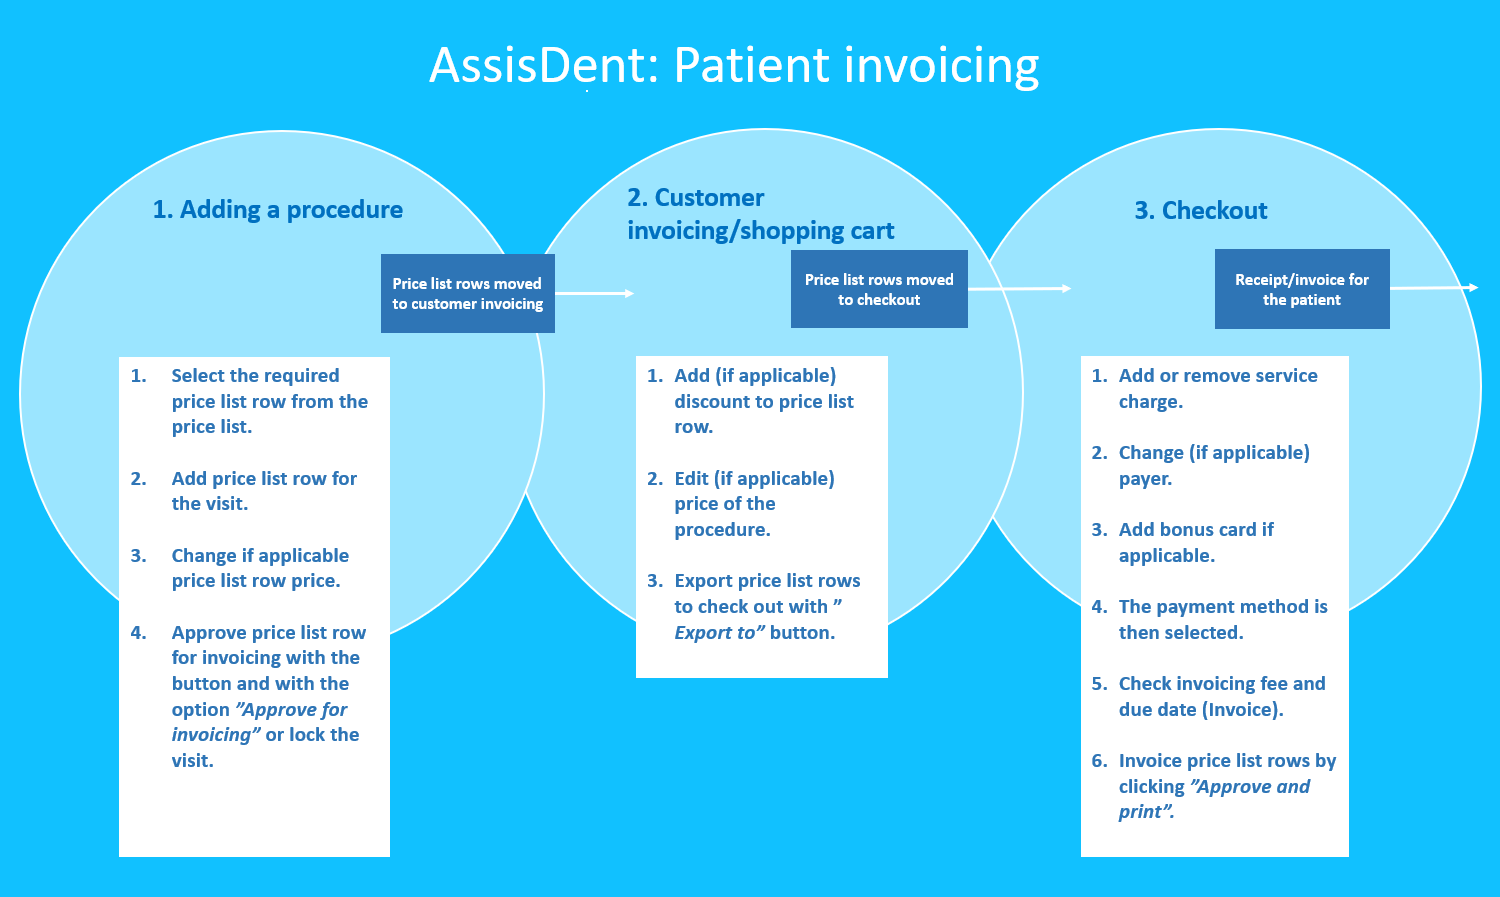
- Adding procedures / price list rows to a visit
- Enter the procedures into the visit document / select the price list rows from the correct price list in Procedures.Please note: If the customer is a business contract customer, the contract must be attached to the visit using the + button before adding the procedures.
- If needed, the price of the price list rows can be edited by clicking on the price in the row in question.
- See instructions: Creating entries
- Approving price list rows for invoicing
- When the price list rows are ready for invoicing, they can be approved for invoicing from the patient record by clicking on the additional options button at the end of the price list row and selecting Approve for invoicing.
- Please note:Once the procedures have been invoiced, they can no longer be changed. Any changes must therefore be made by making another invoice.
- If desired, incorrect price list rows can be archived by selecting the additional options button at the end of the price list row and then clicking Remove.
- Customer invoicing view
- The patient's price list rows are shown in the customer invoice view and in the shopping cart. The patient's price list rows can be exported to the checkout either via the shopping cart or the customer invoice view.
- Price list row information, such as the total amount, can still be changed in the invoice view. Discounts can be added to the price list rows, or the invoicing unit can be changed. You can also add other price list rows from the invoice view if needed.
- Price list rows can be approved for invoicing either from the patient record or from the invoicing view. When the status of the price list rows changes from Waits for approval to Waits for invoicing, the price list rows can be invoiced to the patient. The status can be changed at the end of the price list row by clicking on the additional functions button or by selecting the price list rows and clicking Approve for invoicing.
- The price list rows can be exported to the checkout by selecting Export to checkout.
- See instructions:Invoicing view and shopping cart
- Checkout
- The quantity of the service fee can be changed at the checkout.
- If needed, the payer can be changed at the checkout and a company invoice can also be approved at the checkout when the patient is invoiced.
- A bonus card can also be added to the invoice if needed.
- The payment method is then selected. If needed, you can also divide the total amount between several payment methods.
- To invoice the patient using the selected payment method, click Approve and print. A receipt of the payment/invoice is printed for the patient.
- See instructions: Checkout view